[Fuente: http://blog.varunkumar.me/2010/11/how-to-install-android-market-in-google.html]
Android Emulator es un móvil virtual que va contenido dentro del Android SDK. Se ejecuta en tu equipo y puede ser utilizado para hacer desarrollos de aplicaciones web sin tener que comprar un dispositivo físico. Casi todas las características de hardware y software de un dispositivo móvil típico son emuladas dentro del emulador.
Sin embargo, si quieres probar algunas apps desde el Android Market, no puedes hacerlo porque el emulador no incluye el Android Market. Aqui veremos una guia paso a paso para habilitar el market de Android en el emulador.
Pasos para habilitar el Android Market en el emulador
- Descarga e instala la última versión del Android SDK. Asegurate que el driver ‘ADB Interface’ está instalada en tu equipo.
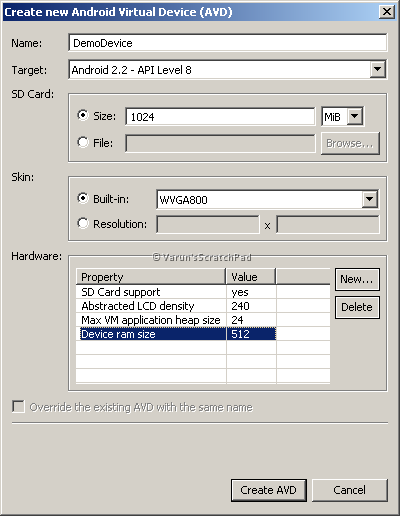
- El siguiente paso es crear un Android Virtual Device con los detalles que se muestran a continuación:

- Después de crear el dispositivo, nos vamos a disco a la ruta ‘%userprofile%/.android/avd’. Hallaremos una carpeta llamada ‘Demodevice.avd‘. Copiemos el archivo imagen de sistema “system.img” desde ‘SDK_LOCATION/platforms/android-8/images’ a la carpeta ‘Demodevice.avd’. Iniciemos el emulador especificando el tamaño de partición. Por linea de comandos:
-
emulator –avd DemoDevice –partition-size 100
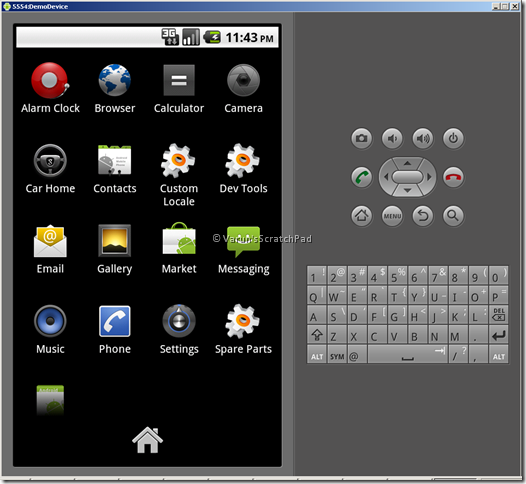
- 100 Mb serán permitidos por el espacio de usuario. El emulador se abre y parece como el de abajo. Nota: Si el emulador de comando no es reconocido, añade SDK_LOCATION/tools to the PATH variable
- Desde el cmd (linea de comandos), ejecuta
adb pull /system/build.prop
Esto copiará el fichero build.prop a tu directorio actual de trabajo. Abrelo con un editor de texto plano y cambia la propiedad ‘ro.config.nocheckin=yes’. Esto se necesita para arreglar que no se congelen las descargas del market. - Now, we have to push back the modified build.prop. This is not as easy as pulling it out. First, you have to mount the /system partition in read-write mode. Check out this to know how to do that. After the partition is remounted, execute the adb push command to push back the build.prop
adb push build.prop /system/
- The next thing is to install the Market application. Download ‘Vending.apk’ from this thread. Google Services framework is a pre-requisite for Android market. To get ‘GoogleServicesFramework.apk’, download upload.zip from here and extract the zip to find the .apk file inside /system/app. Download ‘GoogleServcesFramework.apk’ from here. Push both these .apk to the device. ‘
adb push Vending.apk /system/app/
adb push GoogleServicesFramework.apk /system/app/
.’. Also, delete the SdkSetup.apk from the device.
adb shell rm /system/app/SdkSetup.apk
’. Make sure the SdkSetup.apk is deleted otherwise the emulator will be reverted back to its original stage.
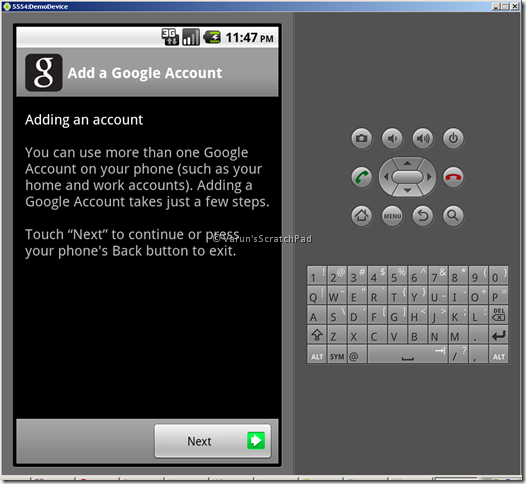
- Close the emulator. Delete the images userdata.img, userdata-qemu.img and cache.img from ‘%userprofile%/.android/avd/DemoDevice.avd’. Start the emulator again from Android SDK and AVD Manager. Android Market will be available on the emulator now. On opening the market, you will be prompted to connect with your Google account. Connect with your Google account and install your favorite apps on the emulator.


