
With directives, you can extend HTML to add declarative syntax to do whatever you like. By doing so, you can replace generic <div>s and <span>s with elements and attributes that actually mean something specific to your application. The ones that come with Angular provide basic functionality, but you can create your own to do things
specific to your application.
First we’re going to go over the directives API and how it fits within the Angular startup and runtime lifecycles. From there, we’ll use this knowledge to create several classes of directives. We’ll finish the chapter with how to write unit tests for directives and how to make these run quickly.
But first, a few notes on the syntax for using directives.
Directives and HTML Validation
Throughout this book, we’ve used Angular’s built-in directives with the ng-directivename syntax. Examples include ng-repeat, ng-view, and ng-controller. Here, the ng portion is the namespace for Angular, and the part after the dash is the name for the directive.
While we prefer this syntax for ease of typing, it isn’t valid in many HTML validation schemes. To support these, Angular lets you invoke any directive in several ways. The following syntaxes, laid out in Table 6-1, are all equivalent to allow for your preferred validator to work properly:
Validator Format Example
none namespace-name ng-repeat=item in items
XML namespace:name ng:repeat=item in items
HTML5 data-namespace-name data-ng-repeat=item in items
xHTML x-namespace-name x-ng-repeat=item in items
Because you can use any of these, the Angular documentation lists directives with a camel-case format, instead of any of these options. For example, ng-repeat is found under the title ngRepeat. As you’ll see in a bit, you’ll use this naming format when defining your own directives.
If you don’t use an HTML validator (most folks don’t), you’ll be just fine using the namespace-directive syntax as you’ve seen in the examples so far.
API Overview
A basic pseudo-code template for creating any directive follows:
var myModule = angular.module(...);
myModule.directive('namespaceDirectiveName', function factory(injectables) {
	var directiveDefinitionObject = {
		restrict: string,
		priority: number,
		template: string,
		templateUrl: string,
		replace: bool,
		transclude: bool,
		scope: bool or object,
		controller: function controllerConstructor($scope,
		$element,
		$attrs,
		$transclude),
		require: string,
		link: function postLink(scope, iElement, iAttrs) { ... },
		compile: function compile(tElement, tAttrs, transclude) {
			return {
				pre: function preLink(scope, iElement, iAttrs, controller) { ... },
				post: function postLink(scope, iElement, iAttrs, controller) { ... }
			}
		}
	};
	return directiveDefinitionObject;
});
Some of the options are mutually exclusive, most of them are optional, and all of them have details that are worth explaining.
Table 6-2 provides an overview of when you’d use each of the options.
Table 6-2. Directive definition options
Property –> Purpose
- restrict –> Declare how directive can be used in a template as an element, attribute, class, comment, or any combination.
- priority –> Set the order of execution in the template relative to other directives on the element.
- template –> Specify an inline template as a string. Not used if you’re specifying your template as a URL.
- templateUrl –> Specify the template to be loaded by URL. This is not used if you’ve specified an inline template as a string.
- replace –> If true, replace the current element. If false or unspecified, append this directive to the current element.
- transclude –> Lets you move the original children of a directive to a location inside the new template.
- scope –> Create a new scope for this directive rather than inheriting the parent scope.
- controller –> Create a controller which publishes an API for communicating across directives.
- require –> Require that another directive be present for this directive to function correctly.
- link –> Programmatically modify resulting DOM element instances, add event listeners, and set up data binding.
- compile –> Programmatically modify the DOM template for features across copies of a directive, as when used in ng-repeat.Your compile function can also return link functions to modify the resulting element instances.
Let’s dig into the details.
Naming Your Directive
You create a name for your directive with a module’s directive function, as in the following:
myModule.directive('directiveName', function factory(injectables)
Though you can name your directives anything you like, the convention is to pick a prefix namespace that identifies your directives and prevents them from colliding with external directives that you might include in your project.
You certainly wouldn’t want to name them with an ng- prefix, as that might collide with Angular’s bundled directives. If you work at SuperDuper MegaCorp, you could choose super-, superduper-, or even superduper-megacorp-, though you might choose the first option just for ease of typing.
As previously noted, Angular uses a normalized naming scheme for directives and will make camel-cased directive names available in templates in the five different validatorfriendly varieties. For example, if you’ve picked your prefix as super- and you’re writing a date-picker component, you might name it superDatePicker. In templates, you could
then use it as super-date-picker, super:date-picker, data-super-date-picker, or another variant.
The Directive Definition Object
As previously mentioned, most of the options in the directive definition are optional.In fact, there are no hard requirements and you can construct useful directives out of many subsets of the parameters. Let’s take a walk through what the options do.
restrict
The restrict property lets you specify the declaration style for your directive—that is, whether it can be used as an element name, attribute, class, or comment. You can specify one or more declaration styles using a character to represent each of them from the set in Table 6-3:
Table 6-3. Options for directive declaration usage
- Character –> Declaration style –> Example
- E –> element –> <my-menu title=Products></my-menu>
- A –> attribute –> <div my-menu=Products></my-menu>
- C –> class –> <div:Products></div>
- M –> comment –> <!– directive: my-menu Products –>
If you wanted to use your directive as either an element or an attribute, you’d pass EA as the restrict string.
If you omit the restrict property, the default is A, and your directive can be used only as an attribute.
If you plan to support IE8, attribute- and class-based directives are your best bet, as it requires extra effort to make new elements work properly. See the Angular documentation for full details on this.
Priorities
In cases where you have multiple directives on a single DOM element and where the order in which they’re applied matters, you can use the priority property to order their application. Higher numbers run first. The default priority is 0 if you don’t specify one.
Needing to set priority will likely be a rare occurrence. One example of a directive that needs to set priority is the ng-repeat. When repeating elements, we want Angular to make copies of the template element before other directives get applied. Without this, the other directives would get applied to the canonical template element rather than to
the repeated elements we want in our app.
Though it’s not in the documentation, you can search the Angular source for the few other directives that use priority. For ng-repeat, we use a priority value of 1000, so there’s plenty of room for other priorities beneath it.
Templates
When creating components, widgets, controls, and so on, Angular lets you replace or wrap the contents of an element with a template that you provide. For example, if you were to create a set of tabbed views in your UI, you would render something like Figure 6-1.
Figure 6-1. Tabbed views
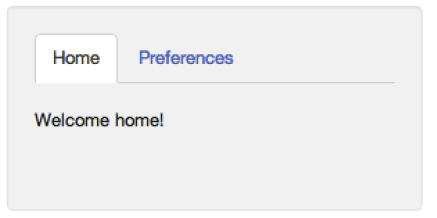
Instead of having a bunch of <div>, <ul><li>, and <a> elements, you could create the directives <tab-set> and <tab>, which declare the structure of each tab respectively.Your HTML then does a much better job of expressing the intent of your template. The end result could look like:
<tab-set>
<tab title='Home'>
<p>Welcome home!</p>
</tab>
<tab title='Preferences'>
<!-- preferences UI goes here -->
</tab>
</tabset>
You could also data bind the strings for title and the tab content via a controller on <tab> or <tabset>. And it’s not limited to tabs—you can do menus, accordions, pop-ups, dialog boxes, or anything else your app needs in this way.
You specify the replacement DOM elements either through the template or the templateUrl properties. You’d use template to set the template content via a string, and templateUrl to refer to the template to be loaded from a file on the server. As you’ll see in the following example, you can pre-cache these templates to reduce the number of GET requests, potentially improve performance.
Let’s write a dumb directive: a <hello> element that just replaces itself with <div>Hi there</div>. In it, we’ll set restrict to allow elements and set template to what we want to display. As the default behavior is to append content to elements, we’ll set replace to true to replace the original template:
var appModule = angular.module('app', []);
  appModule.directive('hello', function() {
    return {
      restrict: 'E',
      template: '<div>Hi there</div>',
      replace: true
    };
});
We’ll use it in a page like so:
<html lang='en' ng-app='app'>
...
<body>
<hello></hello>
</body>
...
Loading it into a browser, we see “Hi there.”
If you were to view the page source, you’d still see the <hello></hello> on the page, but if you inspected the generated source (in Chrome, right-click on Hi there and select Inspect Element), you would see:
<body>
<div>Hi there</div>
</body>
The <hello></hello> was replaced by the <div> from the template.
If you were to remove the replace: true from the directive definition, you’d see <hello><div>Hi there</div></hello>.
You’ll usually want to use templateUrl instead of template, as typing HTML into strings isn’t much fun. The template property is usually only useful for very small templates. Writing as templateUrl is useful, as these templates are cacheable by setting the appropriate headers. We could rewrite our hello directive example like so:
var appModule = angular.module('app', []);
  appModule.directive('hello', function() {
    return {
     restrict: 'E',
     templateUrl: 'helloTemplate.html',
     replace: true
    };
  });
and in helloTemplate.html, you would put:
<div>Hi there</div>
* If you are using Chrome as your browser,and you are testing with localhot , the “same origin policy” will prevent Chrome from loading these templates from file://, and you’ll get an error that says something like “Origin null is not allowed by Access-Control-Allow-Origin.” You have two options here:
- Load your app through a web server
- • Set a flag on Chrome. You can do this by running Chrome from the command line as chrome –allow-file-access-from-files
Loading these files through templateUrl will, however, make your user wait until they load to see the directive. If you want to have the template load with the first page, you can include it as part of the page in a script tag, like so:
<script type='text/ng-template' id='helloTemplateInline.html'>
  <div>Hi there</div>
</script>
The id attribute here is important, as this is the URL key that Angular uses to store the template. You’ll use this id later in your directive’s templateUrl to specify which template to insert.
This version will load just fine without a server, as no XMLHttpRequest is necessary to fetch the content.
Finally, you could load the templates yourself over $http or another mechanism and then set them directly in the object Angular uses called the $templateCache. We want this template available in the cache before the directives run, so we’ll call it via a run function on our module.
var appModule = angular.module('app', []);
appModule.run(function($templateCache) {
    $templateCache.put('helloTemplateCached.html', '<div>Hi there</div>');
});
appModule.directive('hello', function() {
   return {
     restrict: 'E',
     templateUrl: 'helloTemplateCached.html',
     replace: true
   };
});
You would likely want to do this in production only as a technique to reduce the number of GET requests required. You’d run a script to concatenate all the templates into a single file, and load it in a new module that you then reference from your main application module.
Transclusion
In addition to replacing or appending the content, you can also move the original content within the new template through the transclude property. When set to true, the directive will delete the original content, but make it available for reinsertion within your template through a directive called ng-transclude.
We could change our example to use transclusion:
appModule.directive('hello', function() {
  return {
    template: '<div>Hi there <span ng-transclude></span></div>',
    transclude: true
  };
});
applying it as:
<div hello>Bob</div>
We would see:
“Hi there Bob.”
Compile and Link Functions
While inserting templates is useful, the really interesting work of any directive happens in its compile or its link function.
The compile and link functions are named after the two phases Angular uses to create the live view for your application. Let’s take a high-level view of Angular’s initialization process, in order:
Script loads
Angular loads and looks for the ng-app directive to find the application boundaries.
Compile phase
In this phase, Angular walks the DOM to identify all the registered directives in the template. For each directive, it then transforms the DOM based on the directive’s rules (template, replace, transclude, and so on), and calls the compile function if it exists. The result is a compiled template function, which will invoke the link functions collected from all of the directives.
Link phase
To make the view dynamic, Angular then runs a link function for each directive.The link functions typically creates listeners on the DOM or the model. These listeners keep the view and the model in sync at all times.
So we’ve got the compile phase, which deals with transforming the template, and the link phase, which deals with modifying the data in the view. Along these lines, the primary difference between the compile and link functions in directives is that compile functions deal with transforming the template itself, and link functions deal with making a dynamic connection between model and view. It is in this second phase that scopes are attached to the compiled link functions, and the directive becomes live through data binding.
These two phases are separate for performance reasons. Compile functions execute only once in the compile phase, whereas link functions are executed many times, once for each instance of the directive. For example, let’s say you use ng-repeat over your directive.You don’t want to call compile, which causes a DOM-walk on each ng-repeat iteration. Instead, you want to compile once, then link.
While you should certainly learn the differences between compile and link and the capabilities of each, the majority of directives you’ll need to write will not need to transform the template; you’ll write mostly link functions.
Let’s take a look at the syntax for each of these again to compare. For compile, we have:
compile: function compile(tElement, tAttrs, transclude) {
  return {
    pre: function preLink(scope, iElement, iAttrs, controller) { ... }    ,
    post: function postLink(scope, iElement, iAttrs, controller) { ...    }
  }
}
And for link, it is:
link: function postLink(scope, iElement, iAttrs) { ... }
Notice that one difference here is that the link function gets access to a scope but compile does not. This is because during the compile phase, the scope doesn’t exist yet.You do, however, have the ability to return link functions from the compile function.These link functions do have access to the scope.
Notice also that both compile and link receive a reference to their DOM element and the list of attributes for that element. The difference here is that the compile function receives the template element and attributes from the template, and thus gets the t prefix. The link function receives them from the view instances created from the template, and thus gets the i prefix.
This distinction only matters when the directive is within some other directive that makes copies of the template. The ng-repeat directive is a good example.
<div ng-repeat='thing in things'>
  <my-widget config='thing'></my-widget>
</div>
Here, the compile function will be called exactly once, but the link function will be called once per copy of my-widget—equal to the number of elements in things. So, if my-widget needs to modify something in common to all copies (instances) of mywidget,the right place to do this, for efficiency’s sake, is in a compile function.
You will also notice that the compile function receives a transclude function as a property. Here, you have an opportunity to write a function that programmatically transcludes content for situations where the simple template-based transclusion won’t suffice.
Lastly, compile can return both a preLink and a postLink function,whereas link specifies only a postLink function. preLink, as its name implies, runs after the compile phase, but before directives on the child elements are linked. Similarly, postLink runs after all the child element directives are linked. This means that if you need to change the DOM structure, you will do so in postLink. Doing it in the preLink will confuse the attachment process and cause an error.
Scopes
You will often want to access a scope from your directive to watch model values and make UI updates when they change, and to notify Angular when external events cause the model to change. This is most common when you’re wrapping some non-Angular component from jQuery, Closure, or another library, or implementing simple DOM events. Evaluate Angular expressions passed into your directive as attributes.
When you want a scope for one of these reasons, you have three options for the type of scope you’ll get:
1. The existing scope from your directive’s DOM element.
2. A new scope you create that inherits from your enclosing controller’s scope. Here,you’ll have the ability to read all the values in the scopes above this one in the tree.This scope will be shared with any other directives on your DOM element that request this kind of scope and can be used to communicate with them.
3. An isolate scope that inherits no model properties from its parent. You’ll want to use this option when you need to isolate the operation of this directive from the parent scope when creating reusable components.
You can create these scope configurations with the following syntax:
Scope Type –> Syntax
- existing scope –> scope: false (this is the default if unspecified)
- new scope –> scope: true
- isolate scope –> scope: { /* attribute names and binding style */ }
When you create an isolate scope, you don’t have access to anything in the parent scope’s model by default. You can, however, specify that you want specific attributes passed into your directive. You can think of these attribute names as parameters to the function.
Note that while isolate scopes don’t inherit model properties, they are still children of their parent scope. Like all other scopes, they have a $parent property that references their parent.
You can pass specific attributes from the parent scope to the isolate scope by passing a map of directive attribute names. There are three possible ways to pass data to and from the parent scope. We call these different ways of passing data “binding strategies.” You can also, optionally, specify a local alias for the attribute name.The syntax without aliases is in the following form:
scope: { attributeName1: 'BINDING_STRATEGY',
         attributeName2: 'BINDING_STRATEGY', …
}
With aliases, the form is:
scope: { attributeAlias: 'BINDING_STRATEGY' + 'templateAttributeName',
  …
}
The binding strategies are defined by symbols in Table 6-4:
Table 6-4. Binding strategies
Symbol –> Meaning
- @ –> Pass this attribute as a string. You can also data bind values from enclosing scopes by using interpolation {{}} in the attribute value.
- = –> Data bind this property with a property in your directive’s parent scope.
- & –> Pass in a function from the parent scope to be called later.
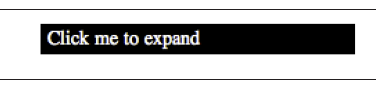
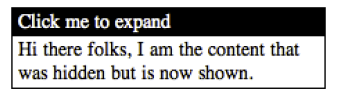
These are fairly abstract concepts, so let’s look at some variations on a concrete example to illustrate. Let’s say that we want to create an expander directive that shows a title bar that expands to display extra content when clicked.It would look like Figure 6-2 when closed.
We would write it as follows:
<div ng-controller='SomeController'>
  <expander class='expander' expander-title='title'>
    {{text}}
  </expander>
</div>
The values for title (Click me to expand) and text (Hi there folks…), come from the enclosing scope. We could set this up with a controller like so:
function SomeController($scope) {
  $scope.title = 'Click me to expand';
  $scope.text = 'Hi there folks, I am the content
    + 'that was hidden but is now shown.';
}
We can then write this directive as:
angular.module('expanderModule', [])
  .directive('expander', function(){
    return {
      restrict: 'EA',
      replace: true,
      transclude: true,
      scope: { title:'=expanderTitle' },
      template: '<div>' +
'<div class="title" ng-click="toggle()">{{title}}</div>' +
'<div class="body" ng-show="showMe" ng-transclude></div>' +
'</div>',
      link: function(scope, element, attrs) {
        scope.showMe = false;
        scope.toggle = function toggle() {
          scope.showMe = !scope.showMe;
        }
     }
   }
});
And for styling, we’d do something like this:
.expander {
  border: 1px solid black;
  width: 250px;
}
.expander > .title {
  background-color: black;
  color: white;
  padding: .1em .3em;
  cursor: pointer;
}
.expander > .body {
  padding: .1em .3em;
}
Let’s look at what each option in the directive is doing for us, in Table 6-5.
Table 6-5. Functions of elements
Function –> Name –> Description
- restrict: EA Invoke this directive as either an element or attribute. That is, <expander…>…</expander> and <div expander…>…</div> are equivalent.
- replace: true Replace the original element with the template we provide.
- transclude: true Move the original element’s content to another location in the provided template.
- scope: { title:=expanderTitle } Create a local scope property called title that is data bound to a parent-scope property declared in the expander-title attribute. Here, we’re renaming expanderTitle as title for convenience. We could have written scope: { expanderTitle: ‘=’ } and referred to it as expanderTitle within our template instead. But in case other directives also have a title attribute,it makes sense to disambiguate our title in the API and just rename it for local use. Also notice here that the naming uses the same camel-case expansion as the directive names themselves do.
- template: <‘div’> +… Declare the template to be inserted for this directive. Note that we’re using ng-click and ng-show to show/hide ourselves and ng-transclude to declare where the original content will go. Also note that transcluded content gets access to the parent scope, not the scope of the directive enclosing it.
- link: … Set up the showMe model to track the expander’s open/closed state and define the toggle() function to be called when users click on the title div.
If we think it would make more sense to define the expander title in the template rather than in the model, we can use the string-style attribute passing denoted by an @ symbol in the scope declaration, like this:
scope: { title:’@expanderTitle’ },
In the template we can achieve the same effect with:
<expander class='expander' expander-title='Click me to expand'>
  {{text}}
</expander>
Note that with this @ strategy we could still data bind the title to our controller’s scope by using interpolation :
<expander class='expander' expander-title='{{title}}'>
  {{text}}
</expander>
Manipulating DOM Elements
The iElement or tElement passed to the directive’s link and compile functions are wrapped references to the native DOM element. If you have loaded the jQuery library, these are jQuery elements you’re already used to working with.
If you’re not using jQuery, the elements are inside an Angular-native wrapper called jqLite. This API has a subset of jQuery that we need to create everything in Angular.For many applications, you can do everything you need with this API alone.
If you need direct access to the raw DOM element you can get it by accessing the first element of the object with element[0].
You can see the full list of supported APIs in the Angular docs for angular.element() —the function you’d use to create jqLite-wrapped DOM elements yourself. It includes functions like addClass(), bind(), find(), toggleClass(), and so on. Again, these are all the most useful core functions from jQuery, but with a much smaller code footprint.
In addition to the jQuery APIs, elements also have Angular-specific functions. These exist whether or not you’re using the full jQuery library.
Table 6-6. Angular specific functions on an element
Function –> Description
- controller(name) When you need to communicate directly with a controller, this function returns the controller attached to the element. If none exists for this element, it walks up the DOM and finds the nearest parent controller instead. The name parameter is optional and is used to specify the name of another directive on this same element. If provided, it will return the controller from that directive. The name should be in the camel-case format as with all directives. That is, ngModel instead of ng-model.
- injector() Gets the injector for the current element or its parent. This allows you to ask for dependencies defined for the modules in these elements.
- scope() Returns the scope of the current element or its nearest parent.
- inheritedData() As with the jQuery function data(), inheritedData() sets and gets data on an element in a leak-proof way. In addition to getting data from the current element, it will also walk up the DOM to find a value.
As an example, let’s re-implement the previous expander example without the help of ng-show and ng-click. It would look like the following:
		.directive(
				'expander2',
				function() {
					return {
						restrict : 'EA',
						replace : true,
						transclude : true,
						scope : {
							title : '=expanderTitle'
						},
						template : '<div>'
								+ '<div class="title">{{title}}</div>'
								+ '<div class="body closed" ng-transclude></div>'
								+ '</div>',
						link : function(scope, element, attrs) {
							var titleElement = angular.element(element.children().eq(0));
							var bodyElement = angular.element(element.children().eq(1));
							titleElement.bind('click', toggle);
							function toggle() {
								bodyElement.toggleClass('closed');
							}
						}
					};
				});
	<div ng-controller='SomeController'>
		<expander2 class='expander' expander-title='title'> {{text}}	</expander2>
	</div>
We’ve removed the ng-click and ng-show directives from the template. Instead, to perform the desired action when users click on the expander title, we’ll create a jqLite element from the title element and bind the click event to it with a toggle() function as its callback. In toggle(), we’ll call toggleClass() on the expander body element to add or remove a class called closed, where we’d set the element to display: none with a class like this:
.closed {
  display: none;
}
Controllers
When you have nested directives that need to communicate with each other, the way to do this is through a controller. A <menu> may need to know about the <menu-item> elements inside it so it can show and hide them appropriately. The same would be true for a <tab-set> knowing about its <tab> elements, or a <grid-view> knowing about its <grid-element> elements.
As previously shown, to create an API to communicate between directives, you can declare a controller as part of a directive with the controller property syntax:
controller: function controllerConstructor($scope, $element, $attrs, $transclude)
This controller function is dependency injected, so the parameters listed here, while potentially useful, are all optional—they can be listed in any order. They’re also only a subset of the services available.
Other directives can have this controller passed to them with the require property syntax. The full form of require looks like:
require: ‘^?directiveName’.Explanations of the require string can be found in Table 6-7.
Option –> Usage
- directiveName –> This camel-cased name specifies which directive the controller should come from. So if our <my-menuitem> directive needs to find a controller on its parent <my-menu>, we’d write it as myMenu.
- ^ –> By default, Angular gets the controller from the named directive on the same element. Adding this optional ^ symbol says to also walk up the DOM tree to find the directive. For the <my-menu> example, we’d need to add this symbol; the final string would be \^myMenu.
- ? –> If the required controller is not found, Angular will throw an exception to tell you about the problem. Adding a ? symbol to the string says that this controller is optional and that an exception shouldn’t be thrown if not found. Though it sounds unlikely, if we wanted to let <my-menu-item>s be used without a <mymenu> container, we could add this for a final require string of ?\^myMenu.
As an example, let’s rewrite our expander directive to be used in a set called “accordion,”which ensures that when you open one expander, the others in the set automatically close.
First, let’s write the accordion directive that will do the coordination. We’ll add our controller constructor here with methods to do the coordination:
var appModule = angular.module('app', []);
appModule.directive('accordion', function() {
	return {
		restrict : 'EA',
		replace : true,
		transclude : true,
		template : '<div ng-transclude></div>',
		controller : function() {
			var expanders = [];
			this.gotOpened = function(selectedExpander) {
				angular.forEach(expanders, function(expander) {
					if (selectedExpander != expander) {
						expander.showMe = false;
					}
				});
			};
			this.addExpander = function(expander) {
				expanders.push(expander);
			};
		}
	};
});

appModule.directive('expander', function() {
	return {
		restrict : 'EA',
		replace : true,
		transclude : true,
		require : '^?accordion',
		scope : {
			title : '=expanderTitle'
		},
		template : '<div>'
				+ '<div class="title" ng-click="toggle()">{{title}}</div>'
				+ '<div class="body" ng-show="showMe" ng-transclude></div>'
				+ '</div>',
		link : function(scope, element, attrs, accordionController) {
			scope.showMe = false;
			accordionController.addExpander(scope);
			scope.toggle = function toggle() {
				scope.showMe = !scope.showMe;
				accordionController.gotOpened(scope);
			};
		}
	};
});
with an appropriate controller, of course:
function SomeController($scope) {
	$scope.expanders = [
			{
				title : 'Click me to expand',
				text : 'Hi there folks, I am the content that was hidden but is now shown.'
			},
			{
				title : 'Click this',
				text : 'I am even better text than you have seen previously'
			},
			{
				title : 'No, click me!',
				text : 'I am text that should be seen before seeing other texts'
			} ];
}
Moving On
As we’ve seen, directives let us extend HTML’s syntax and turn many application tasks into a do-what-I-mean declaration. Directives make reuse a breeze—from configuring your app, like with ng-model and ng-controller, to doing template tasks like ngrepeat and ng-view, to sky’s-the-limit reusable components such as data-grids, bubblecharts,tool-tips, and tabs.