
[Source: https://developer.android.com/develop/ui/views/notifications/build-notification]
Create a Notification
Notifications provide short, timely information about events in your app while it’s not in use. This page teaches you how to create a notification with various features for Android 4.0 (API level 14) and higher. For an introduction to how notifications appear on Android, see the Notifications Overview. For sample code that uses notifications, see the People sample.
Notice that the code on this page uses the NotificationCompat APIs from the Android support library. These APIs allow you to add features available only on newer versions of Android while still providing compatibility back to Android 4.0 (API level 14). However, some new features such as the inline reply action result in a no-op on older versions.
Add the support library
Although most projects created with Android Studio include the necessary dependencies to use NotificationCompat, you should verify that your module-level build.gradle file includes the following dependency:
val core_version = "1.6.0"
dependencies {
    implementation("androidx.core:core-ktx:$core_version")
}
Note: Other libraries in the androidx group also include core as a transitive dependency. So if you’re already using other Jetpack APIs, you might have access to NotificationCompat without requiring the exact dependency shown above.
Create a basic notification
A notification in its most basic and compact form (also known as collapsed form) displays an icon, a title, and a small amount of content text. In this section, you’ll learn how to create a notification that the user can click on to launch an activity in your app.
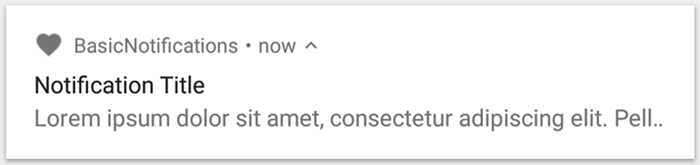
Figure 1. A notification with a title and text
For more details about each part of a notification, read about the notification anatomy.
Set the notification content
To get started, you need to set the notification’s content and channel using a NotificationCompat.Builder object. The following example shows how to create a notification with the following:
- A small icon, set by
setSmallIcon(). This is the only user-visible content that’s required. - A title, set by
setContentTitle(). - The body text, set by
setContentText(). - The notification priority, set by
setPriority(). The priority determines how intrusive the notification should be on Android 7.1 and lower. (For Android 8.0 and higher, you must instead set the channel importance—shown in the next section.)
var builder = NotificationCompat.Builder(this, CHANNEL_ID)
        .setSmallIcon(R.drawable.notification_icon)
        .setContentTitle(textTitle)
        .setContentText(textContent)
        .setPriority(NotificationCompat.PRIORITY_DEFAULT)
Notice that the NotificationCompat.Builder constructor requires that you provide a channel ID. This is required for compatibility with Android 8.0 (API level 26) and higher, but is ignored by older versions.
By default, the notification’s text content is truncated to fit one line. If you want your notification to be longer, you can enable an expandable notification by adding a style template with setStyle(). For example, the following code creates a larger text area:
var builder = NotificationCompat.Builder(this, CHANNEL_ID)
        .setSmallIcon(R.drawable.notification_icon)
        .setContentTitle("My notification")
        .setContentText("Much longer text that cannot fit one line...")
        .setStyle(NotificationCompat.BigTextStyle()
                .bigText("Much longer text that cannot fit one line..."))
        .setPriority(NotificationCompat.PRIORITY_DEFAULT)
For more information about other large notification styles, including how to add an image and media playback controls, see Create a Notification with Expandable Detail.
Create a channel and set the importance
Before you can deliver the notification on Android 8.0 and higher, you must register your app’s notification channel with the system by passing an instance of NotificationChannel to createNotificationChannel(). So the following code is blocked by a condition on the SDK_INT version:
private fun createNotificationChannel() {
    // Create the NotificationChannel, but only on API 26+ because
    // the NotificationChannel class is new and not in the support library
    if (Build.VERSION.SDK_INT >= Build.VERSION_CODES.O) {
        val name = getString(R.string.channel_name)
        val descriptionText = getString(R.string.channel_description)
        val importance = NotificationManager.IMPORTANCE_DEFAULT
        val channel = NotificationChannel(CHANNEL_ID, name, importance).apply {
            description = descriptionText
        }
        // Register the channel with the system
        val notificationManager: NotificationManager =
            getSystemService(Context.NOTIFICATION_SERVICE) as NotificationManager
        notificationManager.createNotificationChannel(channel)
    }
}
Because you must create the notification channel before posting any notifications on Android 8.0 and higher, you should execute this code as soon as your app starts. It’s safe to call this repeatedly because creating an existing notification channel performs no operation.
Notice that the NotificationChannel constructor requires an importance, using one of the constants from the NotificationManager class. This parameter determines how to interrupt the user for any notification that belongs to this channel—though you must also set the priority with setPriority() to support Android 7.1 and lower (as shown above).
Although you must set the notification importance/priority as shown here, the system does not guarantee the alert behavior you’ll get. In some cases the system might change the importance level based other factors, and the user can always redefine what the importance level is for a given channel.
For more information about what the different levels mean, read about notification importance levels.
Set the notification’s tap action
Every notification should respond to a tap, usually to open an activity in your app that corresponds to the notification. To do so, you must specify a content intent defined with a PendingIntent object and pass it to setContentIntent().
The following snippet shows how to create a basic intent to open an activity when the user taps the notification:KotlinJava// Create an explicit intent for an Activity in your app
val intent = Intent(this, AlertDetails::class.java).apply {
flags = Intent.FLAG_ACTIVITY_NEW_TASK or Intent.FLAG_ACTIVITY_CLEAR_TASK
}
val pendingIntent: PendingIntent = PendingIntent.getActivity(this, 0, intent, PendingIntent.FLAG_IMMUTABLE)
val builder = NotificationCompat.Builder(this, CHANNEL_ID)
.setSmallIcon(R.drawable.notification_icon)
.setContentTitle(“My notification”)
.setContentText(“Hello World!”)
.setPriority(NotificationCompat.PRIORITY_DEFAULT)
// Set the intent that will fire when the user taps the notification
.setContentIntent(pendingIntent)
.setAutoCancel(true)
Notice this code calls setAutoCancel(), which automatically removes the notification when the user taps it.
The setFlags() method shown above helps preserve the user’s expected navigation experience after they open your app via the notification. But whether you want to use that depends on what type of activity you’re starting, which may be one of the following:
- An activity that exists exclusively for responses to the notification. There’s no reason the user would navigate to this activity during normal app use, so the activity starts a new task instead of being added to your app’s existing task and back stack. This is the type of intent created in the sample above.
- An activity that exists in your app’s regular app flow. In this case, starting the activity should create a back stack so that the user’s expectations for the Back and Up buttons is preserved.
For more about the different ways to configure your notification’s intent, read Start an Activity from a Notification.
Show the notification
To make the notification appear, call NotificationManagerCompat.notify(), passing it a unique ID for the notification and the result of NotificationCompat.Builder.build(). For example:KotlinJavawith(NotificationManagerCompat.from(this)) {
// notificationId is a unique int for each notification that you must define
notify(notificationId, builder.build())
}
Remember to save the notification ID that you pass to NotificationManagerCompat.notify() because you’ll need it later if you want to update or remove the notification.Note: Beginning with Android 8.1 (API level 27), apps cannot make a notification sound more than once per second. If your app posts multiple notifications in one second, they all appear as expected, but only the first notification per second makes a sound.