
[Fuente: https://developer.android.com/codelabs/kotlin-coroutines#0]
About this codelab
Last updated Sep 21, 2023
Written by a Googler
Before you begin
In this codelab you’ll learn how to use Kotlin Coroutines in an Android app—the recommended way of managing background threads that can simplify code by reducing the need for callbacks.
Coroutines are a Kotlin feature that converts async callbacks for long-running tasks, such as database or network access, into sequential code.
Here is a code snippet to give you an idea of what you’ll be doing:
// Async callbacks
networkRequest { result ->
   // Successful network request
   databaseSave(result) { rows ->
     // Result saved
   }
}
The callback-based code will be converted to sequential code using coroutines:
// The same code with coroutines
val result = networkRequest()
// Successful network request
databaseSave(result)
// Result saved
You will start with an existing app, built using Architecture Components, that uses a callback style for long-running tasks.
By the end of this codelab, you’ll have enough experience to use coroutines in your app to load data from the network, and you will be able to integrate coroutines into an app. You’ll also be familiar with best practices for coroutines, and how to write a test against code that uses coroutines.
Prerequisites
- Familiarity with the Architecture Components
ViewModel,LiveData,Repository, andRoom. - Experience with Kotlin syntax, including extension functions and lambdas.
- A basic understanding of using threads on Android, including the main thread, background threads, and callbacks.
What you’ll do
- Call code written with coroutines and obtain results.
- Use suspend functions to make async code sequential.
- Use
launchandrunBlockingto control how code executes. - Learn techniques to convert existing APIs to coroutines using
suspendCoroutine. - Use coroutines with Architecture Components.
- Learn best practices for testing coroutines.
- For an introduction to Room, see Accessing data using Room DAOs.
- For an introduction to the other Architecture Components used in this codelab, see Guide to app architecture.
- For an introduction to Kotlin syntax, see Kotlin Bootcamp for Programmers.
- For an introduction to threading basics on Android, see Running Android tasks in background threads.
What you’ll need
- Android Studio 4.1 (the codelab may work with other versions, but some things might be missing or look different).
If you run into any issues (code bugs, grammatical errors, unclear wording, etc.) as you work through this codelab, please report the issue via the Report a mistake link in the lower left corner of the codelab.
Getting set up
Download the code
Click the following link to download all the code for this codelab:
… or clone the GitHub repository from the command line by using the following command:
$ git clone https://github.com/android/codelab-kotlin-coroutines.git
The kotlin-coroutines repository contains the code for two codelabs. This codelab uses the project in the coroutines-codelab directory. There are two app modules in that project:
 start — Simple app that uses Android Architecture Components that you will add coroutines to
- finished_code — The project with coroutines already added
Run the starting sample app
First, let’s see what the starting sample app looks like. Follow these instructions to open the sample app in Android Studio.
- If you downloaded the
kotlin-coroutineszip file, unzip the file. - Open the
coroutines-codelabproject in Android Studio. - Select the
startapplication module. - Click the
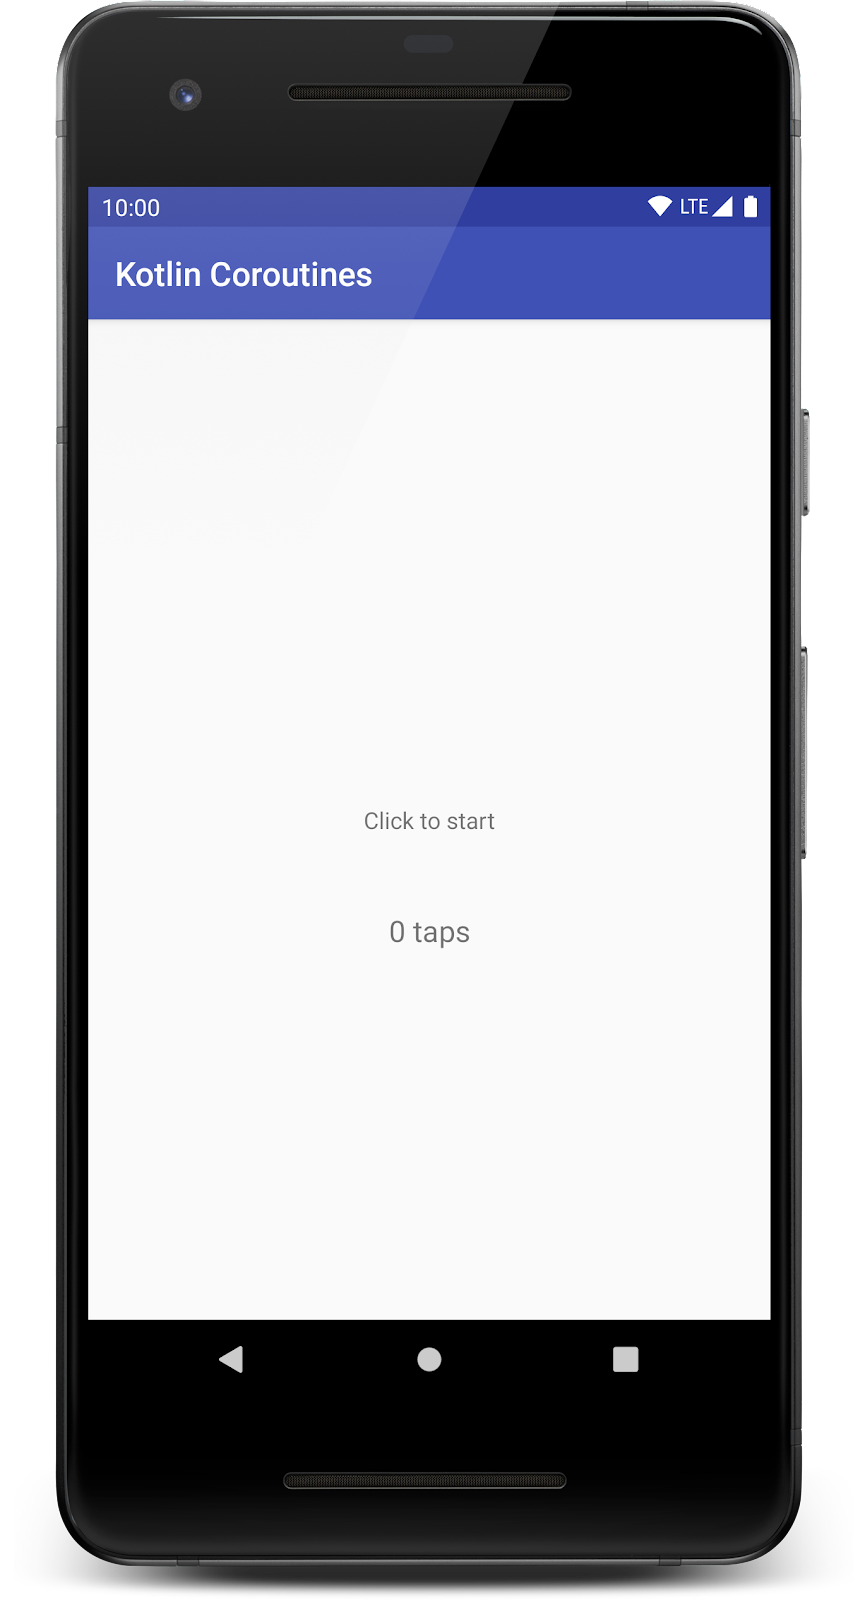
 Run button, and either choose an emulator or connect your Android device, which must be capable of running Android Lollipop (the minimum SDK supported is 21). The Kotlin Coroutines screen should appear:
NOTE: If you see a “Android framework is detected. Click to configure” error message, ensure that you’re opening the coroutines-codelab directory and not the parent directory.
This starter app uses threads to increment the count a short delay after you press the screen. It will also fetch a new title from the network and display it on screen. Give it a try now, and you should see the count and message change after a short delay. In this codelab you’ll convert this application to use coroutines.
This app uses Architecture Components to separate the UI code in MainActivity from the application logic in MainViewModel. Take a moment to familiarize yourself with the structure of the project.
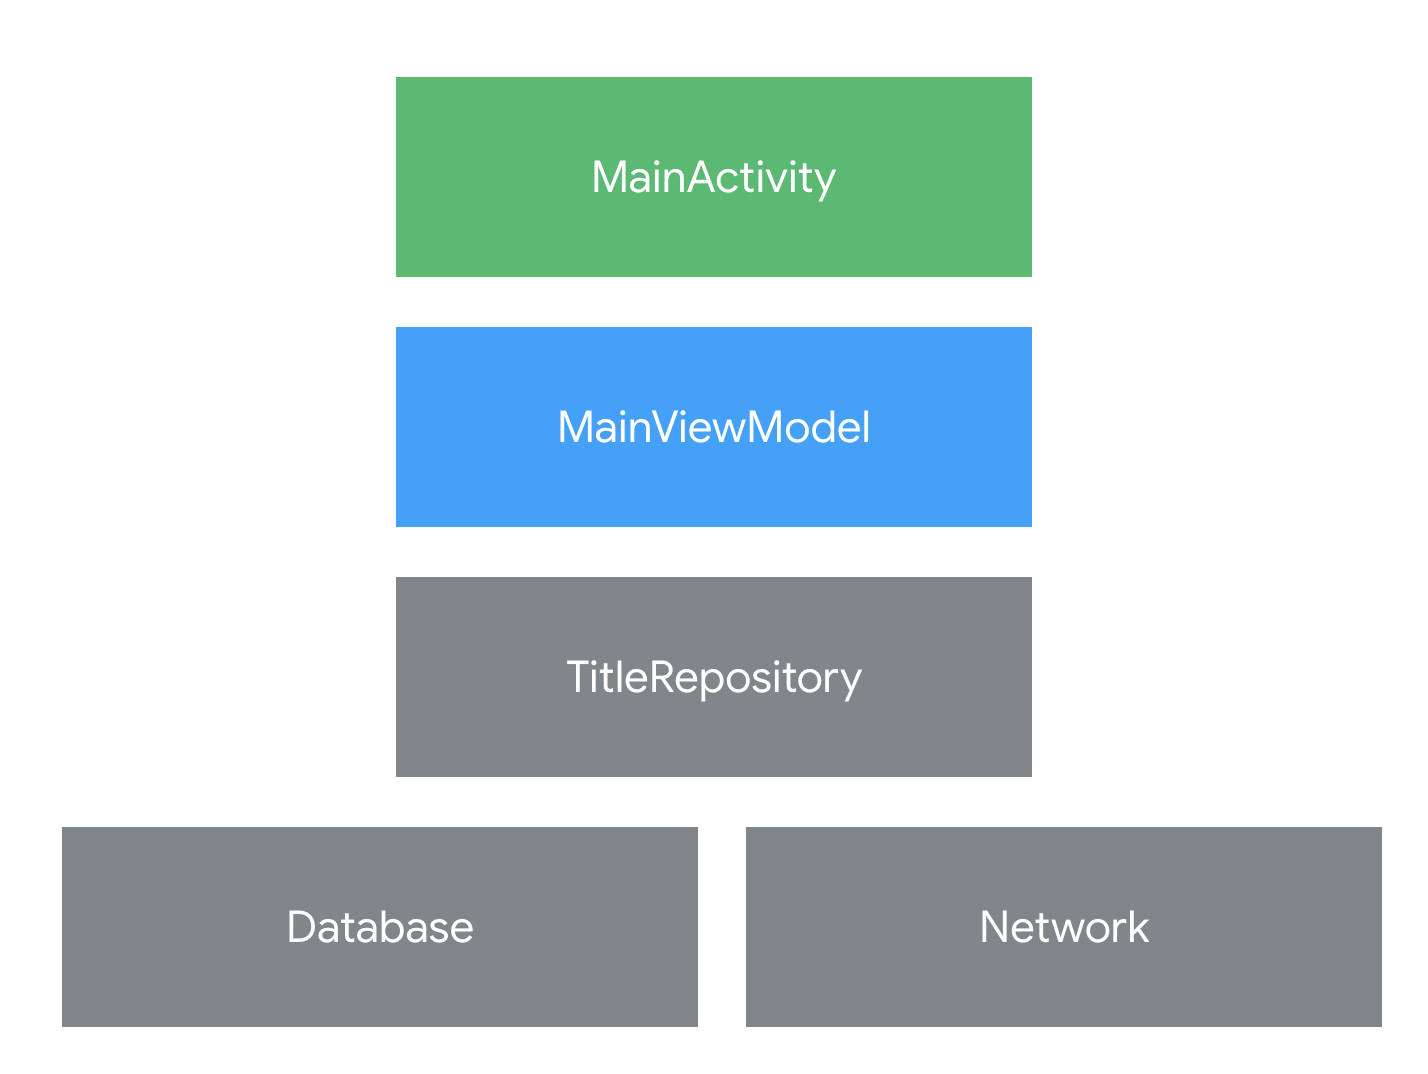
MainActivitydisplays the UI, registers click listeners, and can display aSnackbar. It passes events toMainViewModeland updates the screen based onLiveDatainMainViewModel.MainViewModelhandles events inonMainViewClickedand will communicate toMainActivityusingLiveData.ExecutorsdefinesBACKGROUND,which can run things on a background thread.TitleRepositoryfetches results from the network and saves them to the database.
Adding coroutines to a project
To use coroutines in Kotlin, you must include the coroutines-core library in the build.gradle (Module: app) file of your project. The codelab projects have already done this for you, so you don’t need to do this to complete the codelab.
Coroutines on Android are available as a core library, and Android specific extensions:
- kotlinx-coroutines-core — Main interface for using coroutines in Kotlin
- kotlinx-coroutines-android — Support for the Android Main thread in coroutines
The starter app already includes the dependencies in build.gradle.When creating a new app project, you’ll need to open build.gradle (Module: app) and add the coroutines dependencies to the project.dependencies
{
…
implementation “org.jetbrains.kotlinx:kotlinx-coroutines-core:x.x.x”
implementation “org.jetbrains.kotlinx:kotlinx-coroutines-android:x.x.x”
}
You can find the latest version number of the Coroutines library to substitute for “x.x.x” on the Kotlin Coroutines releases page.
Coroutines and RxJava
If you’re using RxJava in your current codebase, you can integrate with coroutines by using a kotlin-coroutines-rx library.
Coroutines in Kotlin
On Android, it’s essential to avoid blocking the main thread. The main thread is a single thread that handles all updates to the UI. It’s also the thread that calls all click handlers and other UI callbacks. As such, it has to run smoothly to guarantee a great user experience.
For your app to display to the user without any visible pauses, the main thread has to update the screen roughly every 16ms, which is about 60 frames per second. Many common tasks take longer than this, such as parsing large JSON datasets, writing data to a database, or fetching data from the network. Therefore, calling code like this from the main thread can cause the app to pause, stutter, or even freeze. And if you block the main thread for too long, the app may even crash and present an Application Not Responding dialog.
Watch the video below for an introduction to how coroutines solve this problem for us on Android by introducing main-safety.
The callback pattern
One pattern for performing long-running tasks without blocking the main thread is callbacks. By using callbacks, you can start long-running tasks on a background thread. When the task completes, the callback is called to inform you of the result on the main thread.
Take a look at an example of the callback pattern.
// Slow request with callbacks
@UiThread
fun makeNetworkRequest() {
    // The slow network request runs on another thread
    slowFetch { result ->
        // When the result is ready, this callback will get the result
        show(result)
    }
    // makeNetworkRequest() exits after calling slowFetch without waiting for the result
}
Because this code is annotated with @UiThread, it must run fast enough to execute on the main thread. That means, it needs to return very quickly, so that the next screen update is not delayed. However, since slowFetch will take seconds or even minutes to complete, the main thread can’t wait for the result. The show(result) callback allows slowFetch to run on a background thread and return the result when it’s ready.
Using coroutines to remove callbacks
Callbacks are a great pattern, however they have a few drawbacks. Code that heavily uses callbacks can become hard to read and harder to reason about. In addition, callbacks don’t allow the use of some language features, such as exceptions.
Kotlin coroutines let you convert callback-based code to sequential code. Code written sequentially is typically easier to read, and can even use language features such as exceptions.
In the end, they do the exact same thing: wait until a result is available from a long-running task and continue execution. However, in code they look very different.
The keyword suspend is Kotlin’s way of marking a function, or function type, available to coroutines. When a coroutine calls a function marked suspend, instead of blocking until that function returns like a normal function call, it suspends execution until the result is ready then it resumes where it left off with the result. While it’s suspended waiting for a result, it unblocks the thread that it’s running on so other functions or coroutines can run.
For example in the code below, makeNetworkRequest() and slowFetch() are both suspend functions.
// Slow request with coroutines
@UiThread
suspend fun makeNetworkRequest() {
    // slowFetch is another suspend function so instead of
    // blocking the main thread  makeNetworkRequest will `suspend` until the result is
    // ready
    val result = slowFetch()
    // continue to execute after the result is ready
    show(result)
}

// slowFetch is main-safe using coroutines
suspend fun slowFetch(): SlowResult { ... }
Just like with the callback version, makeNetworkRequest must return from the main thread right away because it’s marked @UiThread. This means that usually it could not call blocking methods like slowFetch. Here’s where the suspend keyword works its magic.
Important: The suspend keyword doesn’t specify the thread code runs on. Suspend functions may run on a background thread or the main thread.
Compared to callback-based code, coroutine code accomplishes the same result of unblocking the current thread with less code. Due to its sequential style, it’s easy to chain several long running tasks without creating multiple callbacks. For example, code that fetches a result from two network endpoints and saves it to the database can be written as a function in coroutines with no callbacks. Like so:
// Request data from network and save it to database with coroutines

// Because of the @WorkerThread, this function cannot be called on the
// main thread without causing an error.
@WorkerThread
suspend fun makeNetworkRequest() {
    // slowFetch and anotherFetch are suspend functions
    val slow = slowFetch()
    val another = anotherFetch()
    // save is a regular function and will block this thread
    database.save(slow, another)
}

// slowFetch is main-safe using coroutines
suspend fun slowFetch(): SlowResult { ... }
// anotherFetch is main-safe using coroutines
suspend fun anotherFetch(): AnotherResult { ... }
Coroutines by another name
The pattern of async and await in other languages is based on coroutines. If you’re familiar with this pattern, the suspend keyword is similar to async. However in Kotlin, await() is implicit when calling a suspend function.
Kotlin has a method Deferred.await() that is used to wait for the result from a coroutine started with the async builder.
You will introduce coroutines to the sample app in the next section.
Controlling the UI with coroutines
In this exercise you will write a coroutine to display a message after a delay. To get started, make sure you have the module start open in Android Studio.
Understanding CoroutineScope
In Kotlin, all coroutines run inside a CoroutineScope. A scope controls the lifetime of coroutines through its job. When you cancel the job of a scope, it cancels all coroutines started in that scope. On Android, you can use a scope to cancel all running coroutines when, for example, the user navigates away from an Activity or Fragment. Scopes also allow you to specify a default dispatcher. A dispatcher controls which thread runs a coroutine.
For coroutines started by the UI, it is typically correct to start them on Dispatchers.Main which is the main thread on Android. A coroutine started on Dispatchers.Main won’t block the main thread while suspended. Since a ViewModel coroutine almost always updates the UI on the main thread, starting coroutines on the main thread saves you extra thread switches. A coroutine started on the Main thread can switch dispatchers any time after it’s started. For example, it can use another dispatcher to parse a large JSON result off the main thread.
Coroutines offer main-safety
Because coroutines can easily switch threads at any time and pass results back to the original thread, it’s a good idea to start UI-related coroutines on the Main thread.
Libraries like Room and Retrofit offer main-safety out of the box when using coroutines, so you don’t need to manage threads to make network or database calls. This can often lead to substantially simpler code.
However, blocking code like sorting a list or reading from a file still requires explicit code to create main-safety, even when using coroutines. This is also true if you’re using a networking or database library that doesn’t (yet) support coroutines.
Using viewModelScope
The AndroidX lifecycle-viewmodel-ktx library adds a CoroutineScope to ViewModels that’s configured to start UI-related coroutines. To use this library, you must include it in the build.gradle (Module: start) file of your project. That step is already done in the codelab
projects.dependencies
{ …
// replace x.x.x with latest version implementation “androidx.lifecycle:lifecycle-viewmodel-ktx:x.x.x”
}
The library adds a viewModelScope as an extension function of the ViewModel class. This scope is bound to Dispatchers.Main and will automatically be cancelled when the ViewModel is cleared.
Switch from threads to coroutines
In MainViewModel.kt find the next TODO along with this code:
MainViewModel.kt
/**
* Wait one second then update the tap count.
*/
private fun updateTaps() {
   // TODO: Convert updateTaps to use coroutines
   tapCount++
   BACKGROUND.submit {
       Thread.sleep(1_000)
       _taps.postValue("$tapCount taps")
   }
}
This code uses the BACKGROUND ExecutorService (defined in util/Executor.kt) to run in a background thread. Since sleep blocks the current thread it would freeze the UI if it were called on the main thread. One second after the user clicks the main view, it requests a snackbar.
You can see that happen by removing the BACKGROUND from the code and running it again. The loading spinner won’t display and everything will “jump” to the final state one second later.
MainViewModel.kt
/**
* Wait one second then update the tap count.
*/
private fun updateTaps() {
   // TODO: Convert updateTaps to use coroutines
   tapCount++
   Thread.sleep(1_000)
   _taps.postValue("$tapCount taps")
}
Replace updateTaps with this coroutine based code that does the same thing. You will have to import launch and delay.
MainViewModel.kt
/**
* Wait one second then display a snackbar.
*/
fun updateTaps() {
   // launch a coroutine in viewModelScope
   viewModelScope.launch {
       tapCount++
       // suspend this coroutine for one second
       delay(1_000)
       // resume in the main dispatcher
       // _snackbar.value can be called directly from main thread
       _taps.postValue("$tapCount taps")
   }
}
This code does the same thing, waiting one second before showing a snackbar. However, there are some important differences:
viewModelScope.launchwill start a coroutine in theviewModelScope. This means when the job that we passed toviewModelScopegets canceled, all coroutines in this job/scope will be cancelled. If the user left the Activity beforedelayreturned, this coroutine will automatically be cancelled whenonClearedis called upon destruction of the ViewModel.- Since
viewModelScopehas a default dispatcher ofDispatchers.Main, this coroutine will be launched in the main thread. We’ll see later how to use different threads. - The function
delayis asuspendfunction. This is shown in Android Studio by the icon in the left gutter. Even though this coroutine runs on the main thread,
 delaywon’t block the thread for one second. Instead, the dispatcher will schedule the coroutine to resume in one second at the next statement.
Go ahead and run it. When you click on the main view you should see a snackbar one second later.
In the next section we’ll consider how to test this function.
Testing coroutines through behavior
In this exercise you’ll write a test for the code you just wrote. This exercise shows you how to test coroutines running on Dispatchers.Main using the kotlinx-coroutines-test library. Later in this codelab you’ll implement a test that interacts with coroutines directly.
The kotlinx-coroutines-test library used in this section is marked as experimental and may have breaking changes before release.
Review the existing code
Open MainViewModelTest.kt in the test folder.
MainViewModelTest.kt
class MainViewModelTest {
   @get:Rule
   val coroutineScope =  MainCoroutineScopeRule()
   @get:Rule
   val instantTaskExecutorRule = InstantTaskExecutorRule()

   lateinit var subject: MainViewModel

   @Before
   fun setup() {
       subject = MainViewModel(
           TitleRepository(
                   MainNetworkFake("OK"),
                   TitleDaoFake("initial")
           ))
   }
}
A rule is a way to run code before and after the execution of a test in JUnit. Two rules are used to allow us to test MainViewModel in an off-device test:
InstantTaskExecutorRuleis a JUnit rule that configuresLiveDatato execute each task synchronouslyMainCoroutineScopeRuleis a custom rule in this codebase that configuresDispatchers.Mainto use aTestCoroutineDispatcherfromkotlinx-coroutines-test. This allows tests to advance a virtual-clock for testing, and allows code to useDispatchers.Mainin unit tests.
In the setup method, a new instance of MainViewModel is created using testing fakes – these are fake implementations of the network and database provided in the starter code to help write tests without using the real network or database.
For this test, the fakes are only needed to satisfy the dependencies of MainViewModel. Later in this code lab you’ll update the fakes to support coroutines.
Write a test that controls coroutines
Add a new test that ensures that taps are updated one second after the main view is clicked:
MainViewModelTest.kt
@Test
fun whenMainClicked_updatesTaps() {
   subject.onMainViewClicked()
   Truth.assertThat(subject.taps.getValueForTest()).isEqualTo("0 taps")
   coroutineScope.advanceTimeBy(1000)
   Truth.assertThat(subject.taps.getValueForTest()).isEqualTo("1 taps")
}
By calling onMainViewClicked, the coroutine we just created will be launched. This test checks that the taps text stays “0 taps” right after onMainViewClicked is called, then 1 second later it gets updated to “1 taps”.
This test uses virtual-time to control the execution of the coroutine launched by onMainViewClicked. The MainCoroutineScopeRule lets you pause, resume, or control the execution of coroutines that are launched on the Dispatchers.Main. Here we’re calling advanceTimeBy(1_000) which will cause the main dispatcher to immediately execute coroutines that are scheduled to resume 1 second later.
This test is fully deterministic, which means it will always execute the same way. And, because it has full control over the execution of coroutines launched on the Dispatchers.Main it doesn’t have to wait one second for the value to be set.
Run the existing test
- Right click on the class name
MainViewModelTestin your editor to open a context menu. - In the context menu choose Run ‘MainViewModelTest’
- For future runs you can select this test configuration in the configurations next to the button in the toolbar. By default, the configuration will be called MainViewModelTest.
You should see the test pass! And it should take quite a bit less than one second to run.
In the next exercise you’ll learn how to convert from an existing callback APIs to use coroutines.
Moving from callbacks to coroutines
In this step, you will start converting a repository to use coroutines. To do this, we will add coroutines to the ViewModel, Repository, Room and Retrofit.
It’s a good idea to understand what each part of the architecture is responsible for before we switch them to using coroutines.
MainDatabaseimplements a database using Room that saves and loads aTitle.MainNetworkimplements a network API that fetches a new title. It uses Retrofit to fetch titles.Retrofitis configured to randomly return errors or mock data, but otherwise behaves as if it’s making real network requests.TitleRepositoryimplements a single API for fetching or refreshing the title by combining data from the network and database.MainViewModelrepresents the screen’s state and handles events. It will tell the repository to refresh the title when the user taps on the screen.
Since the network request is driven by UI-events and we want to start a coroutine based on them, the natural place to start using coroutines is in the ViewModel.
The callback version
Open MainViewModel.kt to see the declaration of refreshTitle.
/**
* Update title text via this LiveData
*/
val title = repository.title


// ... other code ...


/**
* Refresh the title, showing a loading spinner while it refreshes and errors via snackbar.
*/
fun refreshTitle() {
   // TODO: Convert refreshTitle to use coroutines
   _spinner.value = true
   repository.refreshTitleWithCallbacks(object: TitleRefreshCallback {
       override fun onCompleted() {
           _spinner.postValue(false)
       }

       override fun onError(cause: Throwable) {
           _snackBar.postValue(cause.message)
           _spinner.postValue(false)
       }
   })
}
This function is called every time the user clicks on the screen – and it will cause the repository to refresh the title and write the new title to the database.
This implementation uses a callback to do a few things:
- Before it starts a query, it displays a loading spinner with
_spinner.value = true - When it gets a result, it clears the loading spinner with
_spinner.value = false - If it gets an error, it tells a snackbar to display and clears the spinner
Note that the onCompleted callback is not passed the title. Since we write all titles to the Room database, the UI updates to the current title by observing a LiveData that’s updated by Room.
In the update to coroutines, we’ll keep the exact same behavior. It’s a good pattern to use an observable data source like a Room database to automatically keep the UI up to date.
What does **object: TitleRefreshCallback** **mean?**: This is the way to build an anonymous class in Kotlin. It makes a new object that implements TitleRefreshCallback.
The coroutines version
Let’s rewrite refreshTitle with coroutines!
Since we’ll need it right away, let’s make an empty suspend function in our repository (TitleRespository.kt). Define a new function that uses the suspend operator to tell Kotlin that it works with coroutines.
TitleRepository.kt
suspend fun refreshTitle() {
    // TODO: Refresh from network and write to database
    delay(500)
}
When you’re done with this codelab, you will update this to use Retrofit and Room to fetch a new title and write it to the database using coroutines. For now, it’ll just spend 500 milliseconds pretending to do work and then continue.
In MainViewModel, replace the callback version of refreshTitle with one that launches a new coroutine:
MainViewModel.kt
/**
* Refresh the title, showing a loading spinner while it refreshes and errors via snackbar.
*/
fun refreshTitle() {
   viewModelScope.launch {
       try {
           _spinner.value = true
           repository.refreshTitle()
       } catch (error: TitleRefreshError) {
           _snackBar.value = error.message
       } finally {
           _spinner.value = false
       }
   }
}
Let’s step through this function:
viewModelScope.launch {Just like the coroutine to update the tap count, begin by launching a new coroutine in viewModelScope. This will use Dispatchers.Main which is OK. Even though refreshTitle will make a network request and database query it can use coroutines to expose a main-safe interface. This means it’ll be safe to call it from the main thread.
Because we’re using viewModelScope, when the user moves away from this screen the work started by this coroutine will automatically be cancelled. That means it won’t make extra network requests or database queries.
When creating a coroutine from a non-coroutine, start with launch.
That way, if they throw an uncaught exception it’ll automatically be propagated to uncaught exception handlers (which by default crash the app). A coroutine started with async won’t throw an exception to its caller until you call await. However, you can only call await from inside a coroutine, since it is a suspend function.
Once inside a coroutine, you can use launch or async to start child coroutines. Use launch for when you don’t have a result to return, and async when you do.
The next few lines of code actually call refreshTitle in the repository.
try {
    _spinner.value = true
    repository.refreshTitle()
}
Before this coroutine does anything it starts the loading spinner – then it calls refreshTitle just like a regular function. However, since refreshTitle is a suspending function, it executes differently than a normal function.
We don’t have to pass a callback. The coroutine will suspend until it is resumed by refreshTitle. While it looks just like a regular blocking function call, it will automatically wait until the network and database query are complete before resuming without blocking the main thread.
} catch (error: TitleRefreshError) {
    _snackBar.value = error.message
} finally {
    _spinner.value = false
}
Exceptions in suspend functions work just like errors in regular functions. If you throw an error in a suspend function, it will be thrown to the caller. So even though they execute quite differently, you can use regular try/catch blocks to handle them. This is useful because it lets you rely on the built-in language support for error handling instead of building custom error handling for every callback.
And, if you throw an exception out of a coroutine – that coroutine will cancel its parent by default. That means it’s easy to cancel several related tasks together.
And then, in a finally block, we can make sure that the spinner is always turned off after the query runs.
What happens to uncaught exceptions
Uncaught exceptions in a coroutine are similar to uncaught exceptions in non-coroutine code. By default, they’ll cancel the coroutine’s Job, and notify parent coroutines that they should cancel themselves. If no coroutine handles the exception, it will eventually be passed to an uncaught exception handler on the CoroutineScope.
By default, uncaught exceptions will be sent to the thread’s uncaught exception handler on the JVM. You can customize this behavior by providing a CoroutineExceptionHandler.
Run the application again by selecting the start configuration then pressing , you should see a loading spinner when you tap anywhere. The title will stay the same because we haven’t hooked up our network or database yet.
In the next exercise you’ll update the repository to actually do work.
Making main-safe functions from blocking code
In this exercise you’ll learn how to switch the thread a coroutine runs on in order to implement a working version of TitleRepository.
Review the existing callback code in refreshTitle
Open TitleRepository.kt and review the existing callback-based implementation.
TitleRepository.kt
// TitleRepository.kt

fun refreshTitleWithCallbacks(titleRefreshCallback: TitleRefreshCallback) {
   // This request will be run on a background thread by retrofit
   BACKGROUND.submit {
       try {
           // Make network request using a blocking call
           val result = network.fetchNextTitle().execute()
           if (result.isSuccessful) {
               // Save it to database
               titleDao.insertTitle(Title(result.body()!!))
               // Inform the caller the refresh is completed
               titleRefreshCallback.onCompleted()
           } else {
               // If it's not successful, inform the callback of the error
               titleRefreshCallback.onError(
                       TitleRefreshError("Unable to refresh title", null))
           }
       } catch (cause: Throwable) {
           // If anything throws an exception, inform the caller
           titleRefreshCallback.onError(
                   TitleRefreshError("Unable to refresh title", cause))
       }
   }
}
In TitleRepository.kt the method refreshTitleWithCallbacks is implemented with a callback to communicate the loading and error state to the caller.
This function does quite a few things in order to implement the refresh.
- Switch to another thread with
BACKGROUNDExecutorService - Run the
fetchNextTitlenetwork request using the blockingexecute()method. This will run the network request in the current thread, in this case one of the threads inBACKGROUND. - If the result is successful, save it to the database with
insertTitleand call theonCompleted()method. - If the result was not successful, or there is an exception, call the onError method to tell the caller about the failed refresh.
This callback based implementation is main-safe because it won’t block the main thread. But, it has to use a callback to inform the caller when the work completes. It also calls the callbacks on the BACKGROUND thread that it switched too.
Calling blocking calls from coroutines
Without introducing coroutines to the network or database, we can make this code main-safe using coroutines. This will let us get rid of the callback and allow us to pass the result back to the thread that initially called it.
You can use this pattern anytime you need to do blocking or CPU intensive work from inside a coroutine such as sorting and filtering a large list or reading from disk.
This pattern should be used for integrating with blocking APIs in your code or performing CPU intensive work. When possible, it’s better to use regular suspend functions from libraries like Room or Retrofit.
To switch between any dispatcher, coroutines uses withContext. Calling withContext switches to the other dispatcher just for the lambda then comes back to the dispatcher that called it with the result of that lambda.
By default, Kotlin coroutines provides three Dispatchers: Main, IO, and Default. The IO dispatcher is optimized for IO work like reading from the network or disk, while the Default dispatcher is optimized for CPU intensive tasks.
TitleRepository.kt
suspend fun refreshTitle() {
   // interact with *blocking* network and IO calls from a coroutine
   withContext(Dispatchers.IO) {
       val result = try {
           // Make network request using a blocking call
           network.fetchNextTitle().execute()
       } catch (cause: Throwable) {
           // If the network throws an exception, inform the caller
           throw TitleRefreshError("Unable to refresh title", cause)
       }

       if (result.isSuccessful) {
           // Save it to database
           titleDao.insertTitle(Title(result.body()!!))
       } else {
           // If it's not successful, inform the callback of the error
           throw TitleRefreshError("Unable to refresh title", null)
       }
   }
}
This implementation uses blocking calls for the network and database – but it’s still a bit simpler than the callback version.
This code still uses blocking calls. Calling execute() and insertTitle(...) will both block the thread that this coroutine is running in. However, by switching to Dispatchers.IO using withContext, we’re blocking one of the threads in the IO dispatcher. The coroutine that called this, possibly running on Dispatchers.Main, will be suspended until the withContext lambda is complete.
Compared to the callback version, there are two important differences:
withContextreturns its result back to the Dispatcher that called it, in this caseDispatchers.Main. The callback version called the callbacks on a thread in theBACKGROUNDexecutor service.- The caller doesn’t have to pass a callback to this function. They can rely on suspend and resume to get the result or error.
Advanced tip
This code doesn’t support coroutine cancellation, but it can! Coroutine cancellation is cooperative. That means your code needs to check for cancellation explicitly, which happens for you whenever you call the functions in kotlinx-coroutines.
Because this withContext block only calls blocking calls it will not be cancelled until it returns from withContext.
To fix this, you can call yield regularly to give other coroutines a chance to run and check for cancellation. Here you would add a call to yield between the network request and the database query. Then, if the coroutine is cancelled during the network request, it won’t save the result to the database.
You can also check cancellation explicitly, which you should do when making low-level coroutine interfaces.
Run the app again
If you run the app again, you’ll see that the new coroutines-based implementation is loading results from the network!
In the next step you’ll integrate coroutines into Room and Retrofit.
Coroutines in Room & Retrofit
To continue the coroutines integration, we’re going to use the support for suspend functions in the stable version of Room and Retrofit, then simplify the code we just wrote substantially by using the suspend functions.
Coroutines in Room
First open MainDatabase.kt and make insertTitle a suspend function:
MainDatabase.kt
// add the suspend modifier to the existing insertTitle

@Insert(onConflict = OnConflictStrategy.REPLACE)
suspend fun insertTitle(title: Title)
When you do this, Room will make your query main-safe and execute it on a background thread automatically. However, it also means that you can only call this query from inside a coroutine.
And – that’s all you have to do to use coroutines in Room. Pretty nifty.
Coroutines in Retrofit
Next let’s see how to integrate coroutines with Retrofit. Open up MainNetwork.kt and change fetchNextTitle to a suspend function. Also change the return type from Call<String> to String.
Suspend function support requires Retrofit 2.6.0 or higher.
MainNetwork.kt
// add suspend modifier to the existing fetchNextTitle
// change return type from Call<String> to String

interface MainNetwork {
   @GET("next_title.json")
   suspend fun fetchNextTitle(): String
}
To use suspend functions with Retrofit you have to do two things:
- Add a suspend modifier to the function
- Remove the
Callwrapper from the return type. Here we’re returningString, but you could return complex json-backed type as well. If you still wanted to provide access to Retrofit’s fullResult, you can returnResult<String>instead ofStringfrom the suspend function.
Retrofit will automatically make suspend functions main-safe so you can call them directly from Dispatchers.Main.
Both Room and Retrofit make suspending functions main-safe.
It’s safe to call these suspend funs from Dispatchers.Main, even though they fetch from the network and write to the database.
Both Room and Retrofit use a custom dispatcher and do not use Dispatchers.IO.
Room will run coroutines using the default query and transaction Executor that’s configured.
Retrofit will create a new Call object under the hood, and call enqueue on it to send the request asynchronously.
Using Room and Retrofit
Now that Room and Retrofit support suspend functions, we can use them from our repository. Open up TitleRepository.kt and see how using suspending functions greatly simplifies logic, even compared to the blocking version:
TitleRepository.kt
suspend fun refreshTitle() {
   try {
       // Make network request using a blocking call
       val result = network.fetchNextTitle()
       titleDao.insertTitle(Title(result))
   } catch (cause: Throwable) {
       // If anything throws an exception, inform the caller
       throw TitleRefreshError("Unable to refresh title", cause)
   }
}
Wow, that’s a lot shorter. What happened? It turns out relying on suspend and resume lets code be much shorter. Retrofit lets us use return types like String or a User object here, instead of a Call. That’s safe to do, because inside the suspend function, Retrofit is able to run the network request on a background thread and resume the coroutine when the call completes.
Even better, we got rid of the withContext. Since both Room and Retrofit provide main-safe suspending functions, it’s safe to orchestrate this async work from Dispatchers.Main.
You do not need to use withContext to call main-safe suspending functions.
By convention, you should ensure that suspend functions written in your application are main-safe. That way it is safe to call them from any dispatcher, even Dispatchers.Main.
Fixing compiler errors
Moving to coroutines does involve changing the signature of functions as you can’t call a suspend function from a regular function. When you added the suspend modifier in this step, a few compiler errors were generated that show what would happen if you changed a function to suspend in a real project.
Go through the project and fix the compiler errors by changing the function to suspend created. Here are the quick resolutions for each:
TestingFakes.kt
Update the testing fakes to support the new suspend modifiers.
TitleDaoFake
- Hit alt-enter (option-enter on a Mac) add suspend modifiers to all functions in the hierarchy
MainNetworkFake
- Hit alt-enter add suspend modifiers to all functions in the hierarchy
- Replace
fetchNextTitlewith this function
override suspend fun fetchNextTitle() = resultMainNetworkCompletableFake
- Hit alt-enter add suspend modifiers to all functions in the hierarchy
- Replace
fetchNextTitlewith this function
override suspend fun fetchNextTitle() = completable.await()TitleRepository.kt
- Delete the
refreshTitleWithCallbacksfunction as it is not used anymore.
Run the app
Run the app again, once it compiles, you will see that it’s loading data using coroutines all the way from the ViewModel to Room and Retrofit!
Congratulations, you’ve completely swapped this app to using coroutines! To wrap up we’ll talk a bit about how to test what we just did.