
[Fuente: https://docs.aws.amazon.com/cdk/v2/guide/hello_world.html]
You’ve read Getting started with the AWS CDK and set up your development environment for writing AWS CDK apps? Great! Now let’s see how it feels to work with the AWS CDK by building the simplest possible AWS CDK app.
In this tutorial, you’ll learn about the following:
- The structure of an AWS CDK project
- How to use the AWS Construct Library to define AWS resources using code
- How to synthesize, diff, and deploy collections of resources using the AWS CDK Toolkit command line tool
The standard AWS CDK development workflow is similar to what you’re already familiar with as a developer, with only a few extra steps.
- Create the app from a template provided by the AWS CDK.
- Add code to the app to create resources within stacks.
- (Optional) Build the app. (The AWS CDK Toolkit does this for you if you forget.)
- Synthesize one or more stacks in the app to create an AWS CloudFormation template.
- Deploy one or more stacks to your AWS account.
The build step catches syntax and type errors. The synthesis step catches logical errors in defining your AWS resources. The deployment may find permission issues. As always, you go back to the code, find the problem, fix it, then build, synthesize, and deploy again.
Tip: Don’t forget to keep your AWS CDK code under version control!
This tutorial walks you through creating and deploying a simple AWS CDK app, from initializing the project to deploying the resulting AWS CloudFormation template. The app contains one stack, which contains one resource, an Amazon S3 bucket.
We’ll also show what happens when you make a change and re-deploy, and how to clean up when you’re done.
Create the app
Each AWS CDK app should be in its own directory, with its own local module dependencies. Create a new directory for your app. Starting in your home directory, or another directory if you prefer, issue the following commands.
Important: Be sure to name your project directory hello-cdk, exactly as shown here. The AWS CDK project template uses the directory name to name things in the generated code. If you use a different name, the code in this tutorial won’t work.
mkdir hello-cdk
cd hello-cdk
Now initialize the app by using the cdk init command. Specify the desired template (“app”) and programming language as shown in the following examples:
- TypeScript
cdk init app --language typescript
Tip: If you don’t specify a template, the default is “app,” which is the one we wanted anyway. Technically, you can omit it and save four keystrokes.
The cdk init command creates a number of files and folders inside the hello-cdk directory to help you organize the source code for your AWS CDK app. Take a moment to explore. The structure of a basic app is all there; you’ll fill in the details in this tutorial.
If you have Git installed, each project you create using cdk init is also initialized as a Git repository. We’ll ignore that for now, but it’s there when you need it.
Build the app
In most programming environments, after changing your code, you build (compile) it. This isn’t strictly necessary with the AWS CDK—the Toolkit does it for you so that you can’t forget. But you can still build manually whenever you want to catch syntax and type errors. For reference, here’s how.
- TypeScript
npm run build
List the stacks in the app
To verify that everything is working correctly, list the stacks in your app.
cdk ls
If you don’t see HelloCdkStack, make sure you named your app’s directory hello-cdk. If you didn’t, go back to Create the app and try again.
Add an Amazon S3 bucket
At this point, your app doesn’t do anything because the stack it contains doesn’t define any resources. Let’s add an Amazon S3 bucket.
The CDK’s Amazon S3 support is part of its main library, aws-cdk-lib, so we don’t need to install another library. We can define an Amazon S3 bucket in the stack using the Bucket construct.
- TypeScript
- JavaScript
- Python
- Java
- C#
- Go
In lib/hello-cdk-stack.ts:
import * as cdk from 'aws-cdk-lib';
import { aws_s3 as s3 } from 'aws-cdk-lib';

export class HelloCdkStack extends cdk.Stack {
  constructor(scope: cdk.App, id: string, props?: cdk.StackProps) {
    super(scope, id, props);

    new s3.Bucket(this, 'MyFirstBucket', {
      versioned: true
    });
  }
}
Bucket is the first construct that we’ve seen, so let’s take a closer look. Like all constructs, the Bucket class takes three parameters.
- scope: Tells the bucket that the stack is its parent: it is defined within the scope of the stack. You can define constructs inside of constructs, creating a hierarchy (tree). Here, and in most cases, the scope is
this(selfin Python), meaning the construct that contains the bucket: the stack. - Id: The logical ID of the Bucket within your AWS CDK app. This (plus a hash based on the bucket’s location within the stack) uniquely identifies the bucket across deployments. This way, the AWS CDK can update it if you change how it’s defined in your app. Here, it’s “MyFirstBucket.” Buckets can also have a name, which is separate from this ID (it’s the
bucketNameproperty). - props: A bundle of values that define properties of the bucket. Here we’ve defined only one property:
versioned, which enables versioning for the files in the bucket.
All constructs take these same three arguments, so it’s easy to stay oriented as you learn about new ones. And as you might expect, you can subclass any construct to extend it to suit your needs, or if you want to change its defaults.
Tip: If a construct’s props are all optional, you can omit the props parameter entirely.
Props are represented differently in the languages supported by the AWS CDK.
- In TypeScript and JavaScript,
propsis a single argument and you pass in an object containing the desired properties. - In Python, props are passed as keyword arguments.
- In Java, a Builder is provided to pass the props. There are two: one for
BucketProps, and a second forBucketto let you build the construct and its props object in one step. This code uses the latter. - In C#, you instantiate a
BucketPropsobject using an object initializer and pass it as the third parameter.
Synthesize an AWS CloudFormation template
Synthesize an AWS CloudFormation template for the app, as follows.
cdk synth
If your app contained more than one stack, you’d need to specify which stack or stacks to synthesize. But since it only contains one, the CDK Toolkit knows you must mean that one.
Tip: If you received an error like --app is required..., it’s probably because you are running the command from a subdirectory. Navigate to the main app directory and try again.
The cdk synth command executes your app, which causes the resources defined in it to be translated into an AWS CloudFormation template. The displayed output of cdk synth is a YAML-format template. Following, you can see the beginning of our app’s output. The template is also saved in the cdk.out directory in JSON format.
Resources:
  MyFirstBucketB8884501:
    Type: AWS::S3::Bucket
    Properties:
      VersioningConfiguration:
        Status: Enabled
    UpdateReplacePolicy: Retain
    DeletionPolicy: Retain
    Metadata:...
Even if you aren’t familiar with AWS CloudFormation, you can find the bucket definition and see how the versioned property was translated.
Note: Every generated template contains a AWS::CDK::Metadata resource by default. (We haven’t shown it here.) The AWS CDK team uses this metadata to gain insight into how the AWS CDK is used, so that we can continue to improve it. For details, including how to opt out of version reporting, see Version reporting.
The cdk synth generates a perfectly valid AWS CloudFormation template. You could take it and deploy it using the AWS CloudFormation console or another tool. But the AWS CDK Toolkit can also do that.
Deploying the stack
To deploy the stack using AWS CloudFormation, issue:
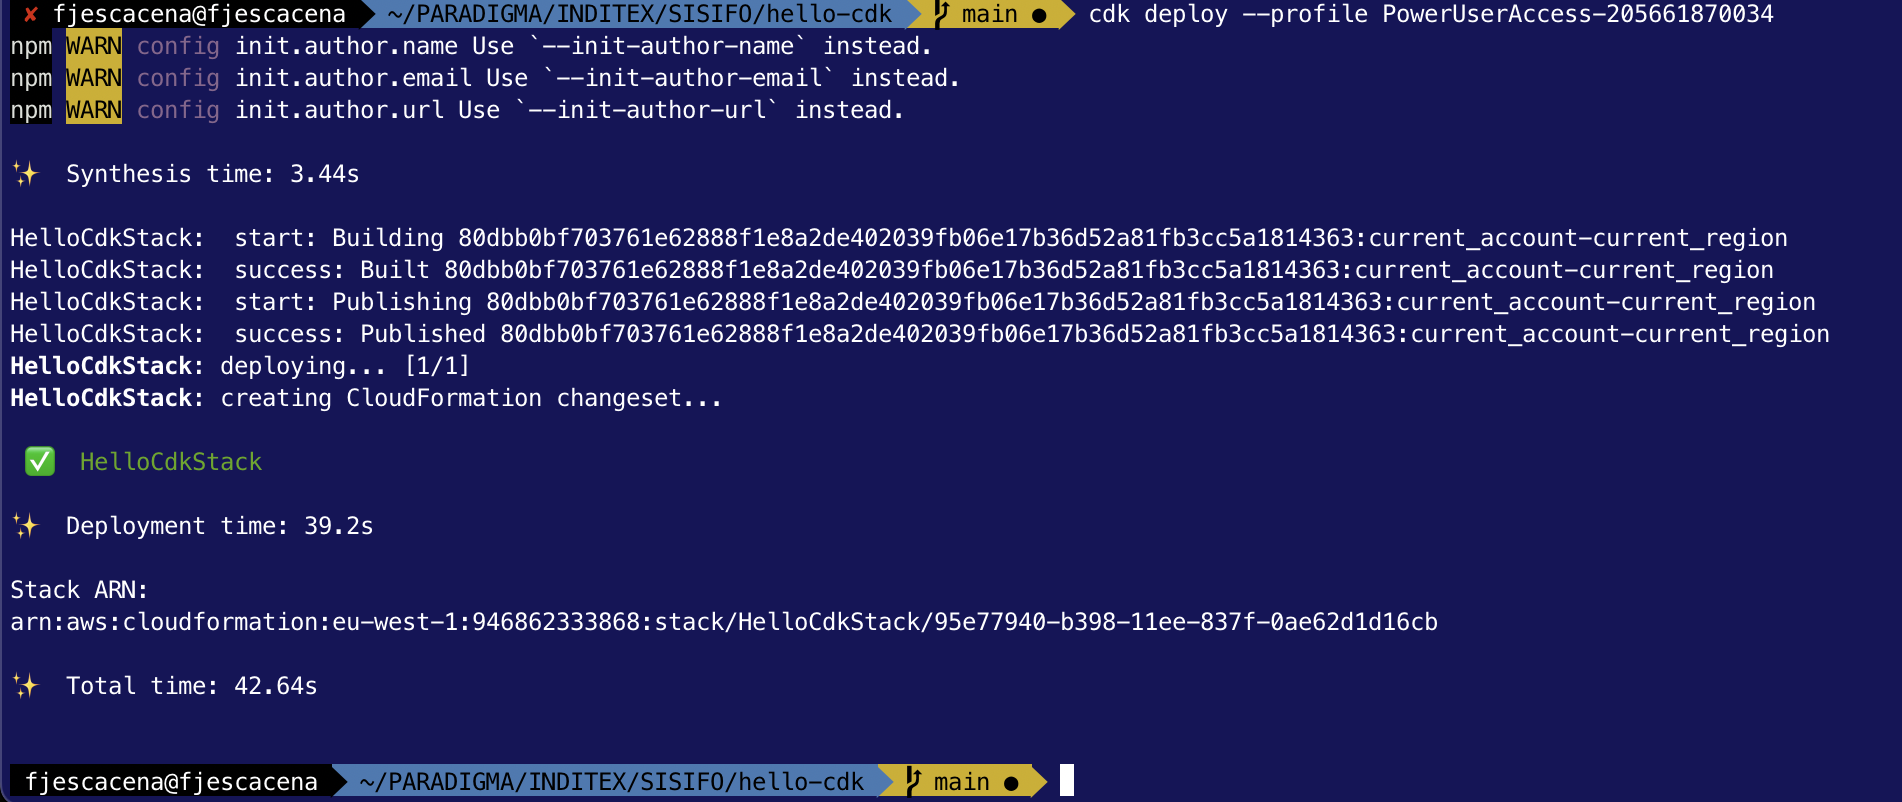
cdk deploy
As with cdk synth, you don’t need to specify the name of the stack since there’s only one in the app.
It is optional (though good practice) to synthesize before deploying. The AWS CDK synthesizes your stack before each deployment.
If your code has security implications, you’ll see a summary of these and need to confirm them before deployment proceeds. This isn’t the case in our stack.
cdk deploy displays progress information as your stack is deployed. When it’s done, the command prompt reappears.
You can go to the AWS CloudFormation console and see that it now lists HelloCdkStack.
https://eu-west-1.console.aws.amazon.com/cloudformation/home

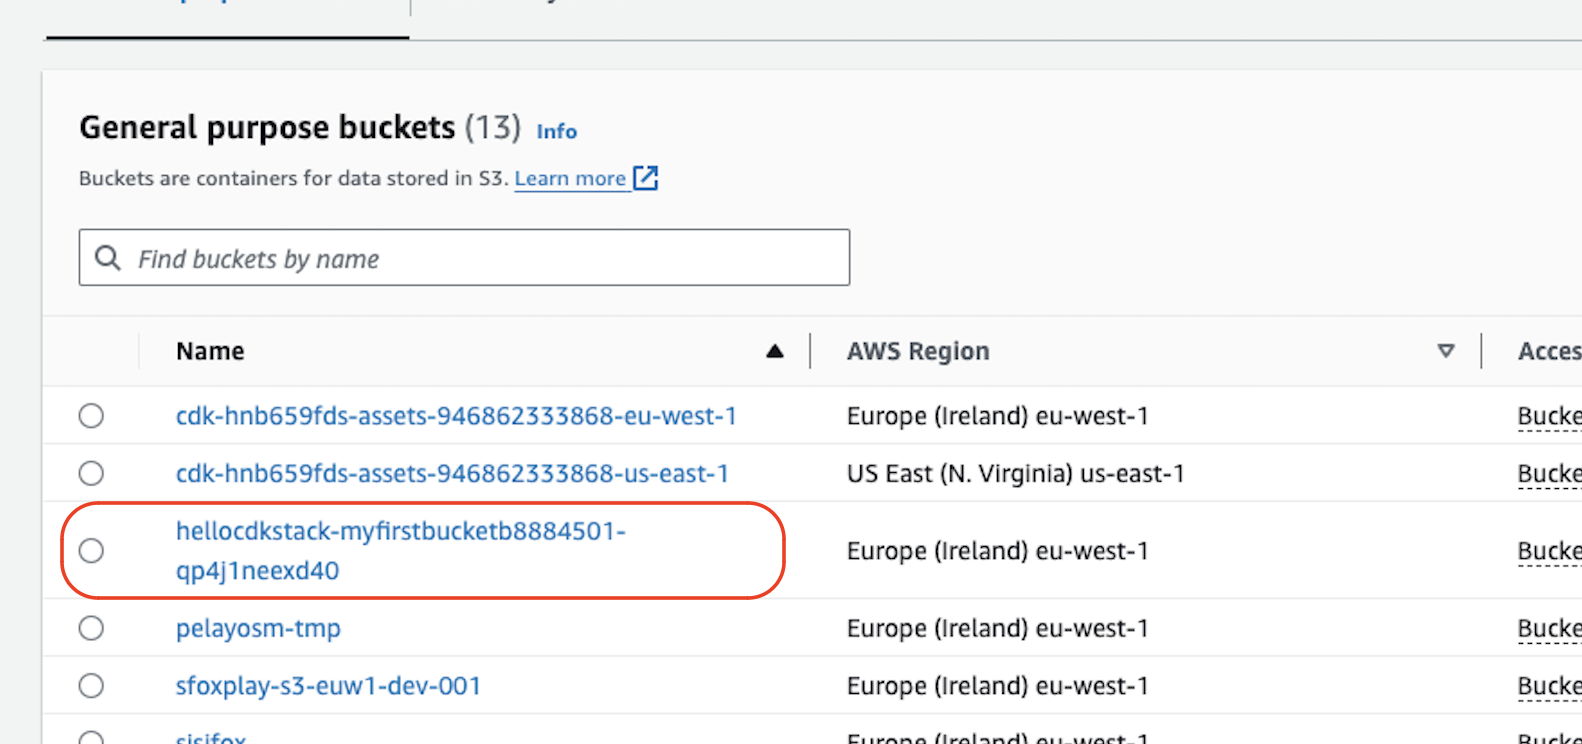
You’ll also find MyFirstBucket in the Amazon S3 console.
https://s3.console.aws.amazon.com/s3/home?region=eu-west-1#
You’ve deployed your first stack using the AWS CDK—congratulations! But that’s not all there is to the AWS CDK.
Cleanup sample
Delete the sample code from your stack #
The project created by cdk init sample-app includes an SQS queue, and an SNS topic. We’re not going to use them in our project, so remove them from your the CdkWorkshopStack constructor.
Open lib/cdk-workshop-stack.ts and clean it up. Eventually it should look like this:
import * as cdk from 'aws-cdk-lib';

export class CdkWorkshopStack extends cdk.Stack {
  constructor(scope: cdk.App, id: string, props?: cdk.StackProps) {
    super(scope, id, props);

    // nothing here!
  }
}
cdk diff #
Now that we modified our stack’s contents, we can ask the toolkit to show us the difference between our CDK app and what’s currently deployed. This is a safe way to check what will happen once we run cdk deploy and is always good practice:
cdk diff
Output should look like the following:
Stack CdkWorkshopStack
IAM Statement Changes
┌───┬─────────────────────────────────┬────────┬─────────────────┬───────────────────────────┬──────────────────────────────────────────────────┐
│ │ Resource │ Effect │ Action │ Principal │ Condition │
├───┼─────────────────────────────────┼────────┼─────────────────┼───────────────────────────┼──────────────────────────────────────────────────┤
│ - │ ${CdkWorkshopQueue50D9D426.Arn} │ Allow │ sqs:SendMessage │ Service:sns.amazonaws.com │ "ArnEquals": { │
│ │ │ │ │ │ "aws:SourceArn": "${CdkWorkshopTopicD368A42F}" │
│ │ │ │ │ │ } │
└───┴─────────────────────────────────┴────────┴─────────────────┴───────────────────────────┴──────────────────────────────────────────────────┘
(NOTE: There may be security-related changes not in this list. See https://github.com/aws/aws-cdk/issues/1299)
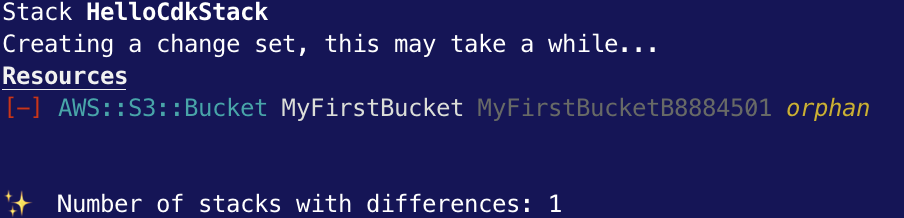
Resources
[-] AWS::SQS::Queue CdkWorkshopQueue50D9D426 destroy
[-] AWS::SQS::QueuePolicy CdkWorkshopQueuePolicyAF2494A5 destroy
[-] AWS::SNS::Topic CdkWorkshopTopicD368A42F destroy
[-] AWS::SNS::Subscription CdkWorkshopTopicCdkWorkshopQueueSubscription88D211C7 destroy
As expected, all of our resources are going to be brutally destroyed.
cdk deploy #
Run cdk deploy and proceed to the next section (no need to wait):
cdk deploy
You should see the resources being deleted.
Hello Lambda
Lambda handler code #
We’ll start with the AWS Lambda handler code.
- Create a directory
lambdain the root of your project tree (next tobinandlib). - TS CDK projects created with
cdk initignore all.jsfiles by default. To track these files with git, add!lambda/*.jsto your.gitignorefile. This ensures that your Lambda assets are discoverable during the Pipelines section of this tutorial. - Add a file called
lambda/hello.jswith the following contents:
exports.handler = async function(event) {
  console.log("request:", JSON.stringify(event, undefined, 2));
  return {
    statusCode: 200,
    headers: { "Content-Type": "text/plain" },
    body: `Hello, CDK! You've hit ${event.path}\n`
  };
};
This is a simple Lambda function which returns the text “Hello, CDK! You’ve hit [url path]”. The function’s output also includes the HTTP status code and HTTP headers. These are used by API Gateway to formulate the HTTP response to the user.
This lambda is provided in Javascript. For more information on writing lambda functions in your language of choice, please refer to the AWS Lambda documentation here.
Install the AWS Lambda construct library #
The AWS CDK is shipped with an extensive library of constructs called the AWS Construct Library. The construct library is divided into modules, one for each AWS service. For example, if you want to define an AWS Lambda function, we will need to use the AWS Lambda construct library.
To discover and learn about AWS constructs, you can browse the AWS Construct Library reference.

A few words about copying & pasting in this workshop #
In this workshop, we highly recommended to type CDK code instead of copying & pasting (there’s usually not much to type). This way, you’ll be able to fully experience what it’s like to use the CDK. It’s especially cool to see your IDE help you with auto-complete, inline documentation and type safety.

Add an AWS Lambda Function to your stack #
Add an import statement at the beginning of lib/cdk-workshop-stack.ts, and a lambda.Function to your stack.
import * as cdk from 'aws-cdk-lib';
import * as lambda from 'aws-cdk-lib/aws-lambda';

export class CdkWorkshopStack extends cdk.Stack {
  constructor(scope: cdk.App, id: string, props?: cdk.StackProps) {
    super(scope, id, props);

    // defines an AWS Lambda resource
    const hello = new lambda.Function(this, 'HelloHandler', {
      runtime: lambda.Runtime.NODEJS_16_X,    // execution environment
      code: lambda.Code.fromAsset('lambda'),  // code loaded from "lambda" directory
      handler: 'hello.handler'                // file is "hello", function is "handler"
    });
  }
}
A few things to notice:
- Our function uses the NodeJS (
NODEJS_16_X) runtime - The handler code is loaded from the
lambdadirectory which we created earlier. Path is relative to where you executecdkfrom, which is the project’s root directory - The name of the handler function is
hello.handler(“hello” is the name of the file and “handler” is the exported function name)
A word about constructs and constructors #
As you can see, the class constructors of both CdkWorkshopStack and lambda.Function (and many other classes in the CDK) have the signature (scope, id, props). This is because all of these classes are constructs. Constructs are the basic building block of CDK apps. They represent abstract “cloud components” which can be composed together into higher level abstractions via scopes. Scopes can include constructs, which in turn can include other constructs, etc.
Constructs are always created in the scope of another construct and must always have an identifier which must be unique within the scope it’s created. Therefore, construct initializers (constructors) will always have the following signature:
scope: the first argument is always the scope in which this construct is created. In almost all cases, you’ll be defining constructs within the scope of current construct, which means you’ll usually just want to passthisfor the first argument. Make a habit out of it.id: the second argument is the local identity of the construct. It’s an ID that has to be unique amongst construct within the same scope. The CDK uses this identity to calculate the CloudFormation Logical ID for each resource defined within this scope. To read more about IDs in the CDK, see the CDK user manual.props: the last (sometimes optional) argument is always a set of initialization properties. Those are specific to each construct. For example, thelambda.Functionconstruct accepts properties likeruntime,codeandhandler. You can explore the various options using your IDE’s auto-complete or in the online documentation.
Diff #
Save your code, and let’s take a quick look at the diff before we deploy:
cdk diff
Output would look like this:
Stack CdkWorkshopStack
IAM Statement Changes
┌───┬─────────────────────────────────┬────────┬────────────────┬──────────────────────────────┬───────────┐
│   │ Resource                        │ Effect │ Action         │ Principal                    │ Condition │
├───┼─────────────────────────────────┼────────┼────────────────┼──────────────────────────────┼───────────┤
│ + │ ${HelloHandler/ServiceRole.Arn} │ Allow  │ sts:AssumeRole │ Service:lambda.amazonaws.com │           │
└───┴─────────────────────────────────┴────────┴────────────────┴──────────────────────────────┴───────────┘
IAM Policy Changes
┌───┬─────────────────────────────┬────────────────────────────────────────────────────────────────────────────────┐
│   │ Resource                    │ Managed Policy ARN                                                             │
├───┼─────────────────────────────┼────────────────────────────────────────────────────────────────────────────────┤
│ + │ ${HelloHandler/ServiceRole} │ arn:${AWS::Partition}:iam::aws:policy/service-role/AWSLambdaBasicExecutionRole │
└───┴─────────────────────────────┴────────────────────────────────────────────────────────────────────────────────┘
(NOTE: There may be security-related changes not in this list. See https://github.com/aws/aws-cdk/issues/1299)

Parameters
[+] Parameter AssetParameters/3342065582ab8a3599385f447c9f5d5b141c726eb5dc468594ec8450a97f3cb7/S3Bucket AssetParameters3342065582ab8a3599385f447c9f5d5b141c726eb5dc468594ec8450a97f3cb7S3BucketEB5CA0D6: {"Type":"String","Description":"S3 bucket for asset \"3342065582ab8a3599385f447c9f5d5b141c726eb5dc468594ec8450a97f3cb7\""}
[+] Parameter AssetParameters/3342065582ab8a3599385f447c9f5d5b141c726eb5dc468594ec8450a97f3cb7/S3VersionKey AssetParameters3342065582ab8a3599385f447c9f5d5b141c726eb5dc468594ec8450a97f3cb7S3VersionKeyC5F120D1: {"Type":"String","Description":"S3 key for asset version \"3342065582ab8a3599385f447c9f5d5b141c726eb5dc468594ec8450a97f3cb7\""}
[+] Parameter AssetParameters/3342065582ab8a3599385f447c9f5d5b141c726eb5dc468594ec8450a97f3cb7/ArtifactHash AssetParameters3342065582ab8a3599385f447c9f5d5b141c726eb5dc468594ec8450a97f3cb7ArtifactHashBAACCCD2: {"Type":"String","Description":"Artifact hash for asset \"3342065582ab8a3599385f447c9f5d5b141c726eb5dc468594ec8450a97f3cb7\""}

Resources
[+] AWS::IAM::Role HelloHandler/ServiceRole HelloHandlerServiceRole11EF7C63
[+] AWS::Lambda::Function HelloHandler HelloHandler2E4FBA4D
As you can see, this code synthesizes an AWS::Lambda::Function resource. It also synthesized a couple of CloudFormation parameters that are used by the toolkit to propagate the location of the handler code.
Deploy #
Let’s deploy:
cdk deploy
You’ll notice that cdk deploy not only deployed your CloudFormation stack, but also archived and uploaded the lambda directory from your disk to the bootstrap bucket.
Testing our function #
Let’s go to the AWS Lambda Console and test our function.
- Open the AWS Lambda Console (make sure you are in the correct region).You should see our function:

- Click on the function name to go to the console.
- Click on the Test button to open the Configure test event dialog:

- Select Amazon API Gateway AWS Proxy from the Event template list.
- Enter
testunder Event name.
- Hit Create.
- Click Test again and wait for the execution to complete.
- Expand Details in the Execution result pane and you should see our expected output:
