
[Fuente: https://vuejs.org/v2/guide/single-file-components.html]
Single File Components
Introduction
In many Vue projects, global components will be defined using Vue.component, followed by new Vue({ el: '#container' }) to target a container element in the body of every page.
This can work very well for small to medium-sized projects, where JavaScript is only used to enhance certain views. In more complex projects however, or when your frontend is entirely driven by JavaScript, these disadvantages become apparent:
- Global definitions force unique names for every component
- String templates lack syntax highlighting and require ugly slashes for multiline HTML
- No CSS support means that while HTML and JavaScript are modularized into components, CSS is conspicuously left out
- No build step restricts us to HTML and ES5 JavaScript, rather than preprocessors like Pug (formerly Jade) and Babel
All of these are solved by single-file components with a .vue extension, made possible with build tools such as Webpack or Browserify.
Here’s an example of a file we’ll call Hello.vue:

Now we get:
As promised, we can also use preprocessors such as Pug, Babel (with ES2015 modules), and Stylus for cleaner and more feature-rich components.

These specific languages are only examples. You could as easily use Bublé, TypeScript, SCSS, PostCSS – or whatever other preprocessors that help you be productive. If using Webpack with vue-loader, it also has first-class support for CSS Modules.
What About Separation of Concerns?
One important thing to note is that separation of concerns is not equal to separation of file types. In modern UI development, we have found that instead of dividing the codebase into three huge layers that interweave with one another, it makes much more sense to divide them into loosely-coupled components and compose them. Inside a component, its template, logic and styles are inherently coupled, and collocating them actually makes the component more cohesive and maintainable.
Even if you don’t like the idea of Single-File Components, you can still leverage its hot-reloading and pre-compilation features by separating your JavaScript and CSS into separate files:
<!-- my-component.vue -->
<template>
  <div>This will be pre-compiled</div>
</template>
<script src="./my-component.js"></script>
<style src="./my-component.css"></style>
Getting Started
Example Sandbox
If you want to dive right in and start playing with single-file components, check out this simple todo app on CodeSandbox.
For Users New to Module Build Systems in JavaScript
With .vue components, we’re entering the realm of advanced JavaScript applications. That means learning to use a few additional tools if you haven’t already:
- Node Package Manager (NPM): Read the Getting Started guide section about how to get packages from the registry.
- Modern JavaScript with ES2015/16: Read through Babel’s Learn ES2015 guide. You don’t have to memorize every feature right now, but keep this page as a reference you can come back to.
After you’ve taken a day to dive into these resources, we recommend checking out Vue CLI 3. Follow the instructions and you should have a Vue project with .vue components, ES2015, Webpack and hot-reloading in no time!
For Advanced Users
The CLI takes care of most of the tooling configurations for you, but also allows fine-grained customization through its own config options.
In case you prefer setting up your own build setup from scratch, you will need to manually configure webpack with vue-loader. To learn more about webpack itself, check out their official docs and Webpack Academy.
VUEJS CLI
[Fuente: https://cli.vuejs.org/guide/installation.html]
Node Version Requirement
Vue CLI requires Node.js version 8.9 or above (8.11.0+ recommended). You can manage multiple versions of Node on the same machine with nvm or nvm-windows.
To install the new package, use one of the following commands. You need administrator privileges to execute these unless npm was installed on your system through a Node.js version manager (e.g. n or nvm).
npm install -g @vue/cli
# OR
yarn global add @vue/cli
After installation, you will have access to the vue binary in your command line. You can verify that it is properly installed by simply running vue, which should present you with a help message listing all available commands.
You can check you have the right version (3.x) with this command:
vue --versionInstant Prototyping
You can rapidly prototype with just a single *.vue file with the vue serve and vue build commands, but they require an additional global addon to be installed first:
npm install -g @vue/cli-service-global
# or
yarn global add @vue/cli-service-global
The drawback of vue serve is that it relies on globally installed dependencies which may be inconsistent on different machines. Therefore this is only recommended for rapid prototyping.
vue serve
Usage: serve [options] [entry]

serve a .js or .vue file in development mode with zero config


Options:

  -o, --open         Open browser
  -c, --copy         Copy local url to clipboard
  -p, --port <port>  Port used by the server (default: 8080 or next available port)
  -h, --help         Output usage information
All you need is an App.vue file:
<template>
  <h1>Hello!</h1>
</template>
Then in the directory with the App.vue file, run:
vue serve
vue serve uses the same default setup (webpack, babel, postcss & eslint) as projects created by vue create. It automatically infers the entry file in the current directory – the entry can be one of main.js, index.js, App.vue or app.vue. You can also explicitly specify the entry file:
vue serve MyComponent.vue
If needed, you can also provide an index.html, package.json, install and use local dependencies, or even configure babel, postcss & eslint with corresponding config files.
vue build
Usage: build [options] [entry]

build a .js or .vue file in production mode with zero config


Options:

  -t, --target <target>  Build target (app | lib | wc | wc-async, default: app)
  -n, --name <name>      name for lib or web-component (default: entry filename)
  -d, --dest <dir>       output directory (default: dist)
  -h, --help             output usage information
You can also build the target file into a production bundle for deployment with vue build:
vue build MyComponent.vue
vue build also provides the ability to build the component as a library or a web component. See Build Targets for more details.
Creating a Project
vue create
To create a new project, run:
vue create hello-world
A new project can also be generated inside an existing directory, like so:
vue create .
If you are on Windows using Git Bash with minTTY, the interactive prompts will not work. You must launch the command as winpty vue.cmd create hello-world. If you however want to still use the vue create hello-world syntax, you can alias the command by adding the following line to your ~/.bashrc file. alias vue='winpty vue.cmd' You will need to restart your Git Bash terminal session to pull in the updated bashrc file.
You will be prompted to pick a preset. You can either choose the default preset which comes with a basic Babel + ESLint setup, or select “Manually select features” to pick the features you need.
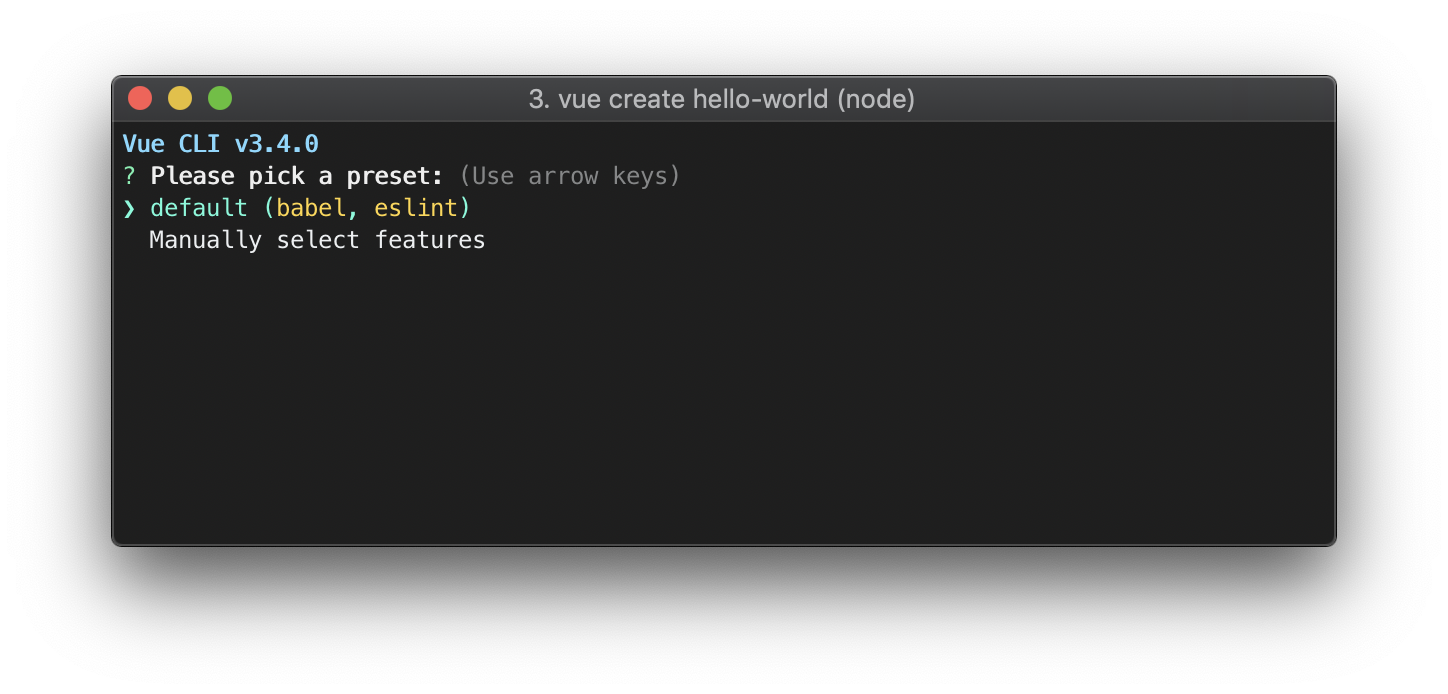
The default setup is great for quickly prototyping a new project, while the manual setup provides more options that are likely needed for more production-oriented projects.
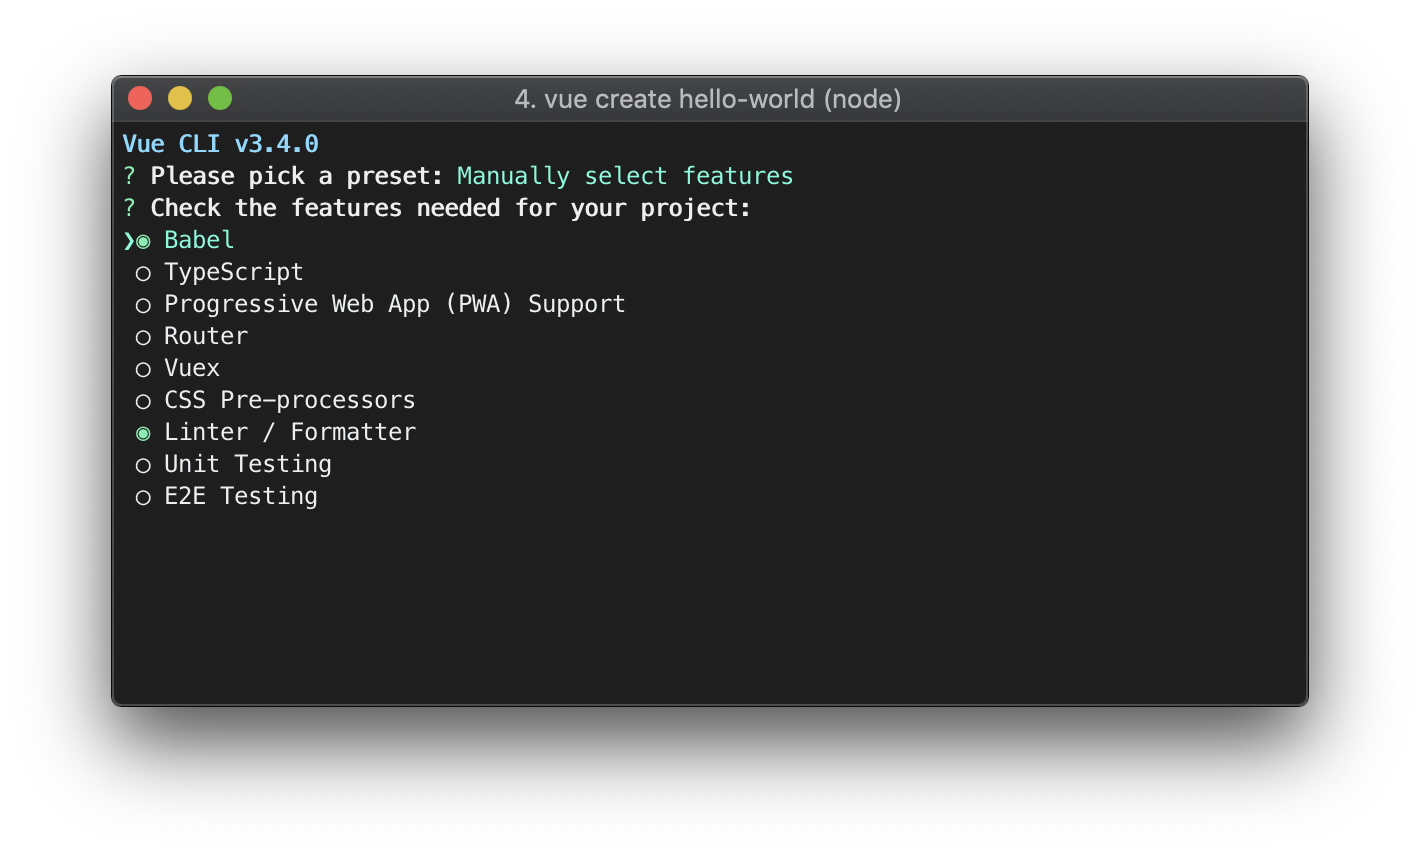
If you chose to manually select features, at the end of the prompts you also have the option to save your selections as a preset so that you can reuse it in the future. We will discuss presets and plugins in the next section.
~/.vuerc
Saved presets will be stored in a JSON file named .vuerc in your user home directory. If you wish to modify saved presets / options, you can do so by editing this file.
During the project creation process, you may also be prompted to select a preferred package manager, or use the Taobao npm registry mirror for faster dependency installation. Your choices will also be saved in ~/.vuerc.
The vue create command has a number of options and you can explore them all by running:
vue create --help
Usage: create [options] <app-name>

create a new project powered by vue-cli-service


Options:

  -p, --preset <presetName>       Skip prompts and use saved or remote preset
  -d, --default                   Skip prompts and use default preset
  -i, --inlinePreset <json>       Skip prompts and use inline JSON string as preset
  -m, --packageManager <command>  Use specified npm client when installing dependencies
  -r, --registry <url>            Use specified npm registry when installing dependencies
  -g, --git [message|false]       Force / skip git initialization, optionally specify initial commit message
  -n, --no-git                    Skip git initialization
  -f, --force                     Overwrite target directory if it exists
  -c, --clone                     Use git clone when fetching remote preset
  -x, --proxy                     Use specified proxy when creating project
  -b, --bare                      Scaffold project without beginner instructions
  -h, --help                      Output usage information
Using the GUI
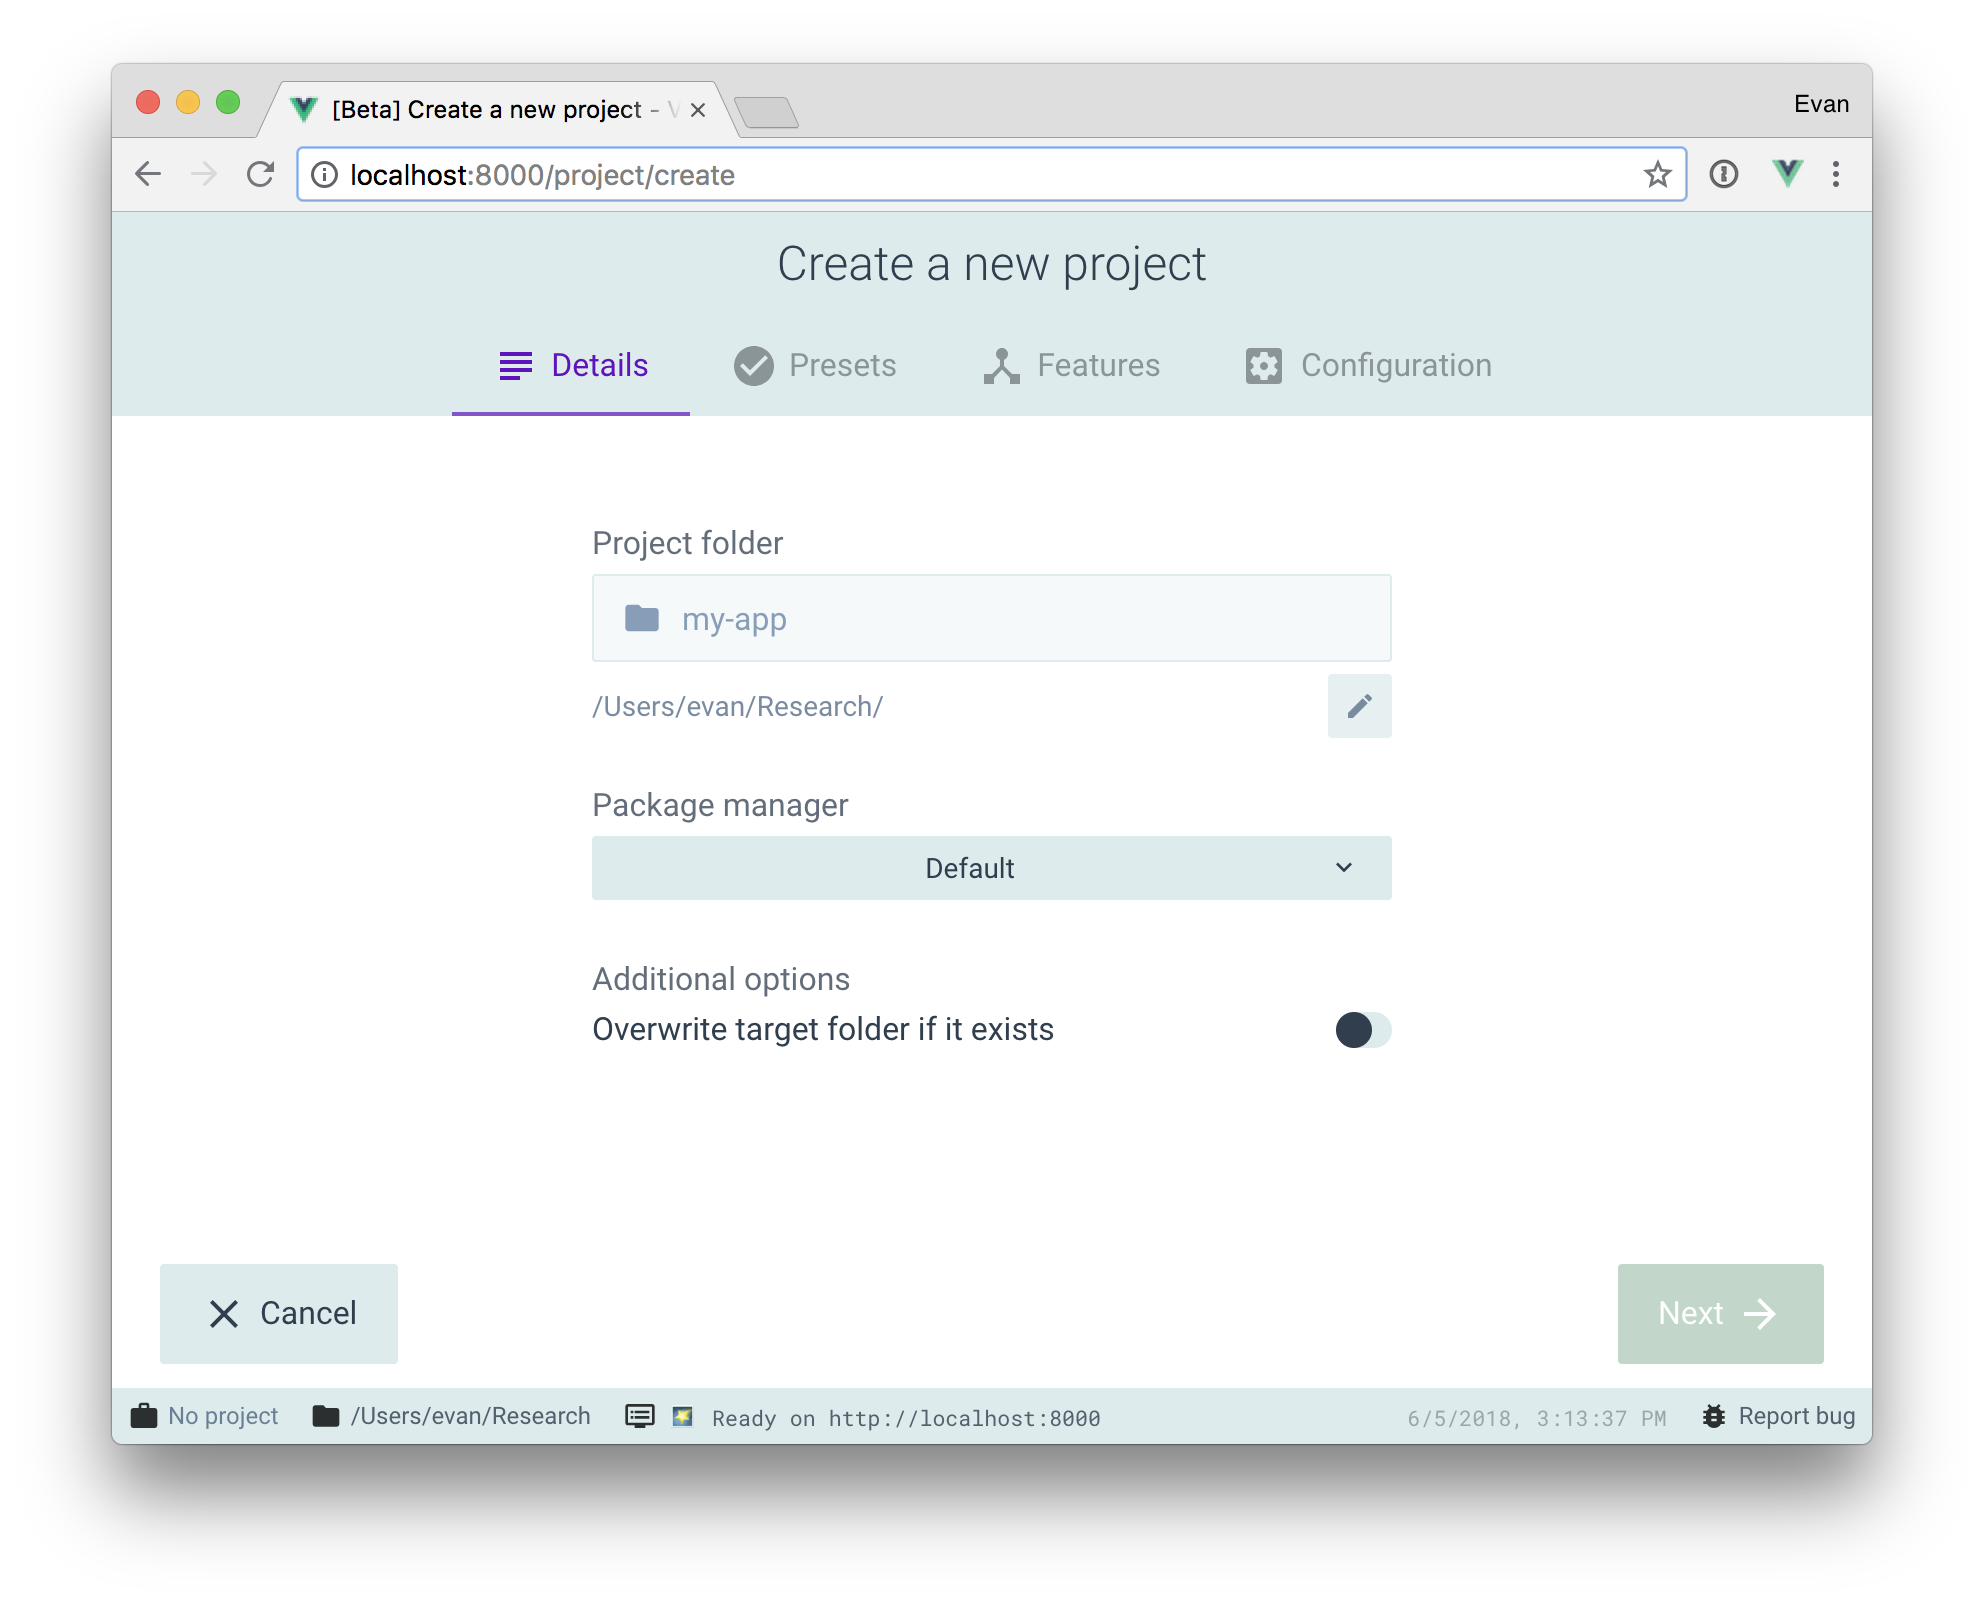
You can also create and manage projects using a graphical interface with the vue ui command:
vue ui
The above command will open a browser window with a GUI that guides you through the project creation process.
Pulling 2.x Templates (Legacy)
Vue CLI >= 3 uses the same vue binary, so it overwrites Vue CLI 2 (vue-cli). If you still need the legacy vue init functionality, you can install a global bridge:
npm install -g @vue/cli-init
# vue init now works exactly the same as vue-cli@2.x
vue init webpack my-project
HTML and Static Assets
HTML
The Index File
The file public/index.html is a template that will be processed with html-webpack-plugin. During build, asset links will be injected automatically. In addition, Vue CLI also automatically injects resource hints (preload/prefetch), manifest/icon links (when PWA plugin is used), and the asset links for the JavaScript and CSS files produced during the build.
Interpolation
Since the index file is used as a template, you can use the lodash template syntax to interpolate values in it:
<%= VALUE %>for unescaped interpolation;<%- VALUE %>for HTML-escaped interpolation;<% expression %>for JavaScript control flows.
In addition to the default values exposed by html-webpack-plugin, all client-side env variables are also available directly. For example, to use the BASE_URL value:
<link rel="icon" href="<%= BASE_URL %>favicon.ico">
See also:
Preload
<link rel="preload"> is a type of resource hint that is used to specify resources that your pages will need very soon after loading, which you therefore want to start preloading early in the lifecycle of a page load, before the browser’s main rendering machinery kicks in.
By default, a Vue CLI app will automatically generate preload hints for all files that are needed for the initial rendering of your app.
The hints are injected using @vue/preload-webpack-plugin and can be modified / deleted via chainWebpack as config.plugin('preload').
Prefetch
<link rel="prefetch"> is a type of resource hint that tells the browser to prefetch content that the user may visit in the near future in the browser’s idle time, after the page finishes loading.
By default, a Vue CLI app will automatically generate prefetch hints for all JavaScript files generated for async chunks (as a result of on-demand code splitting via dynamic import()).
The hints are injected using @vue/preload-webpack-plugin and can be modified / deleted via chainWebpack as config.plugin('prefetch').
Note for multi page setups
When using a multipage setup, the plugin name above should be changed to match the structure ‘prefetch-{pagename}’, for example ‘prefetch-app’.
Example:
// vue.config.js
module.exports = {
  chainWebpack: config => {
    // remove the prefetch plugin
    config.plugins.delete('prefetch')

    // or:
    // modify its options:
    config.plugin('prefetch').tap(options => {
      options[0].fileBlacklist = options[0].fileBlacklist || []
      options[0].fileBlacklist.push(/myasyncRoute(.)+?\.js$/)
      return options
    })
  }
}
When the prefetch plugin is disabled, you can manually select specific chunks to prefetch using webpack’s inline comments:
import(/* webpackPrefetch: true */ './someAsyncComponent.vue')
webpack’s runtime will inject prefetch links when the parent chunk is loaded.
Prefetch links will consume bandwidth. If you have a large app with many async chunks and your users are primarily mobile and thus bandwidth-aware, you may want to disable prefetch links and manually select chunks to prefetch.
Disable Index Generation
When using Vue CLI with an existing backend, you may need to disable the generation of index.html so that the generated assets can be used in a server-rendered page. To do so, the following can be added to vue.config.js:
// vue.config.js
module.exports = {
  // disable hashes in filenames
  filenameHashing: false,
  // delete HTML related webpack plugins
  chainWebpack: config => {
    config.plugins.delete('html')
    config.plugins.delete('preload')
    config.plugins.delete('prefetch')
  }
}
However, this is not really recommended because:
- Hard-coded file names makes it more difficult to implement efficient cache control.
- Hard-coded file names also do not play well with code-splitting, which generates additional JavaScript files with varying filenames.
- Hard-coded file names do not work with Modern Mode.
Instead, you should consider using the indexPath option to use the generated HTML as a view template in your server-side framework.
Building a Multi-Page App
Not every app has to be an SPA. Vue CLI supports building a multi-paged app using the pages option in vue.config.js. The built app will efficiently share common chunks between multiple entries for optimal loading performance.
Static Assets Handling
Static assets can be handled in two different ways:
- Imported in JavaScript or referenced in templates/CSS via relative paths. Such references will be handled by webpack.
- Placed in the
publicdirectory and referenced via absolute paths. These assets will simply be copied and not go through webpack.
Relative Path Imports
When you reference a static asset using relative path (must start with .) inside JavaScript, CSS or *.vue files, the asset will be included into webpack’s dependency graph. During this compilation process, all asset URLs such as <img src="...">, background: url(...) and CSS @import are resolved as module dependencies.
For example, url(./image.png) will be translated into require('./image.png'), and
<img src="./image.png">
will be compiled into:
h('img', { attrs: { src: require('./image.png') }})
Internally, we use file-loader to determine the final file location with version hashes and correct public base paths, and use url-loader to conditionally inline assets that are smaller than 4kb, reducing the amount of HTTP requests.
You can adjust the inline file size limit via chainWebpack. For example, to set the limit to 10kb instead:
// vue.config.js
module.exports = {
  chainWebpack: config => {
    config.module
      .rule('images')
        .use('url-loader')
          .loader('url-loader')
          .tap(options => Object.assign(options, { limit: 10240 }))
  }
}
URL Transform Rules
- If the URL is an absolute path (e.g.
/images/foo.png), it will be preserved as-is. - If the URL starts with
., it’s interpreted as a relative module request and resolved based on the folder structure on your file system. - If the URL starts with
~, anything after it is interpreted as a module request. This means you can even reference assets inside node modules:<img src="~some-npm-package/foo.png"> - If the URL starts with
@, it’s also interpreted as a module request. This is useful because Vue CLI by default aliases@to<projectRoot>/src. (templates only)
The public Folder
Any static assets placed in the public folder will simply be copied and not go through webpack. You need to reference them using absolute paths.
Note we recommend importing assets as part of your module dependency graph so that they will go through webpack with the following benefits:
- Scripts and stylesheets get minified and bundled together to avoid extra network requests.
- Missing files cause compilation errors instead of 404 errors for your users.
- Result filenames include content hashes so you don’t need to worry about browsers caching their old versions.
The public directory is provided as an escape hatch, and when you reference it via absolute path, you need to take into account where your app will be deployed. If your app is not deployed at the root of a domain, you will need to prefix your URLs with the publicPath:
- In
public/index.htmlor other HTML files used as templates byhtml-webpack-plugin, you need to prefix the link with<%= BASE_URL %>:<link rel="icon" href="<%= BASE_URL %>favicon.ico"> - In templates, you will need to first pass the base URL to your component:
data () {
  return {
    publicPath: process.env.BASE_URL
  }
}
Then:
<img :src="`${publicPath}my-image.png`">
When to use the public folder
- You need a file with a specific name in the build output.
- You have thousands of images and need to dynamically reference their paths.
- Some library may be incompatible with Webpack and you have no other option but to include it as a
<script>tag.
fdfd